Introduction: Why Cooling Is the Secret Weapon of Great 3D Prints
Cooling is one of the most critical yet overlooked aspects of 3D printing. Without proper part cooling, your prints can suffer from stringing, poor overhang quality, warping, and generally mushy details that make even well-designed models look amateurish. Whether you are printing PLA with its sharp crystalline structures or tackling flexible filaments like TPU that need precise thermal management, the right cooling fan setup makes the difference between a print that looks factory-finished and one that looks like it came off a hobby bench.
In this comprehensive guide, we will explore every type of 3D printer cooling solution available in 2026 from simple axial fans to advanced dual-part-cooling systems with active shrouds. We cover what each fan does, which printers benefit most from upgrades, and recommend the best products for every budget and use case.
If you are just getting started on your cooling journey, also check out our guide to bed leveling tools because even the best cooling will not save a print with poor first-layer adhesion.
Understanding 3D Printer Cooling: The Three Fan Types
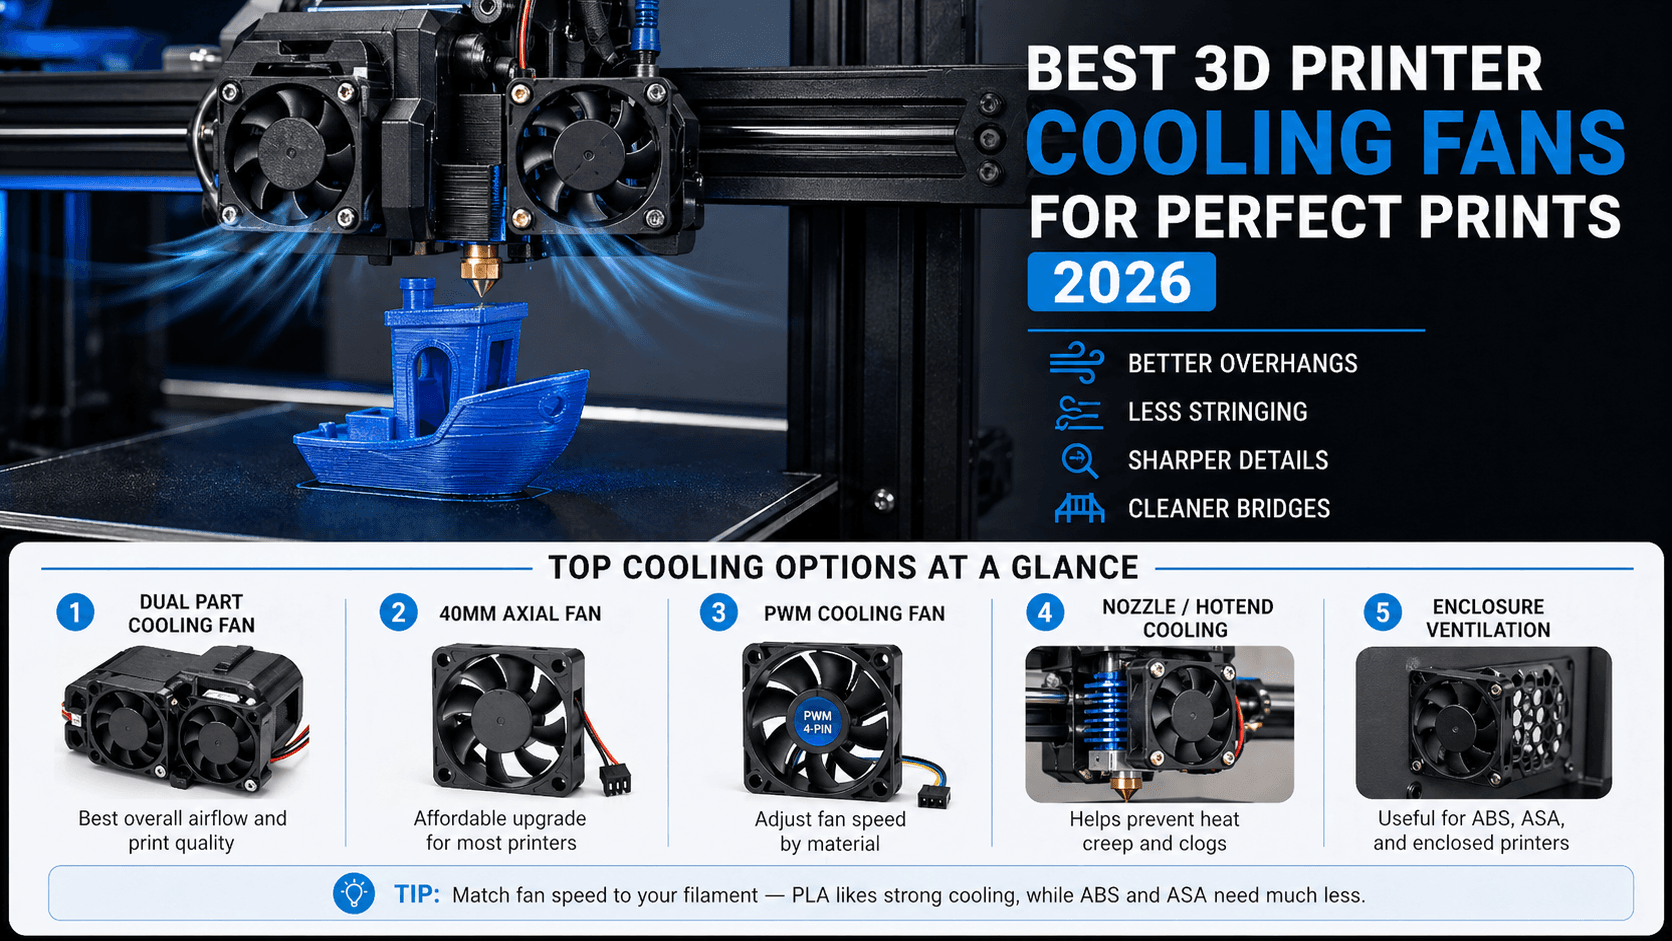
Most FDM (Fused Deposition Modeling) 3D printers use three distinct fan systems, each serving a different purpose. Understanding these will help you choose the right upgrade path for your printer.
1. Hotend or Nozzle Cooling Fan (Part Cooling Fan)
This is the most important cooling fan on any FDM printer. Mounted directly behind or beside the hotend, it blows a focused stream of air across the freshly extruded filament to cool and solidify it almost instantly. This rapid cooling is essential for several reasons.
- Overhangs and bridges: Without adequate cooling, molten plastic sags under its own weight before it can harden. Good part cooling lets you print overhangs up to 45 to 60 degrees without support material.
- Fine details: Small features like text, logos, and intricate geometries require fast solidification to maintain their shape.
- Reducing stringing: When the filament cools quickly between travel moves, less oozed plastic means fewer strings and hairs on your finished print.
- Cleaner layer lines: Proper cooling prevents layers from re-melting each other, giving you sharper definition between layers.
2. Electronics Cooling Fan
This fan keeps the printer motherboard, power supply, and stepper motor drivers at safe operating temperatures. While it does not directly affect print quality, overheating electronics can cause unexpected shutdowns during long prints, corrupted firmware states, or even permanent hardware damage.
3. Enclosure or Ambient Cooling Fan
For printers with enclosed chambers or when you add an enclosure, these fans manage the overall temperature inside the chamber and provide ventilation for fumes especially important when printing ABS, ASA, or other materials that release volatile organic compounds.
The Best Part Cooling Fans: Our Top Picks
Part cooling is where upgrades deliver the most visible improvement. Here are the best options available in 2026, from budget-friendly to premium.
1. Bondtech Dual Part Cooling Fan The Gold Standard
The Bondtech dual part cooling fan has been the go-to upgrade for serious 3D printing enthusiasts for years and remains unmatched in 2026. Unlike single-fan designs that blow air from one direction, the Bondtech uses two small fans mounted on opposite sides of a custom shroud to deliver perfectly balanced airflow across both sides of the extruded filament.
The result is dramatically improved overhang quality, cleaner bridges, and significantly reduced stringing especially noticeable when printing PLA at high speeds. The dual-fan design also means you get excellent cooling even if one fan fails, making it more reliable than single-fan alternatives.
Best for: Creality Ender series, Prusa i3 clones, and any printer using a standard 40mm hotend assembly
The Bondtech Dual Part Cooling Fan 40mm is the single best cooling upgrade you can make for most FDM printers.
2. E3D V6 Part Cooling Shroud with Integrated Fan
E3D approach to part cooling integrates the fan directly into a precision-machined shroud that fits over their popular V6 hotend. The shroud features dual 40mm fan mounts and optimized internal airflow channels that direct air precisely where it needs to go onto the fresh filament, not wasted on surrounding components.
The E3D cooling shroud is particularly well-suited for users who are already upgrading their hotend, as it replaces both the stock hotend and cooling assembly in one swap. The airflow design has been CFD-optimized (computational fluid dynamics) to maximize cooling efficiency while minimizing noise.
Best for: Users upgrading from a stock hotend; printers with limited space around the nozzle
The E3D V6 Part Cooling Shroud with Dual 40mm Fans is an excellent choice when you are already replacing your hotend.
3. Micro Swiss Direct Drive Cooling Fan Assembly
If you are running a direct drive extruder common on Bambu Lab, Prusa Mini+, and many newer budget printers, the Micro Swiss cooling fan assembly is purpose-built for those configurations. It features a compact dual-fan design that fits in tight spaces while still delivering the airflow needed for quality prints.
The assembly includes everything you need: two 30mm fans, a custom shroud, mounting hardware, and cable extensions. Installation typically takes under 15 minutes with basic tools, and the improvement in print quality especially on overhangs and small details is immediately apparent.
Best for: Direct drive printers including Bambu Lab A1 series, Prusa Mini+, and Creality K1
The Micro Swiss Direct Drive Cooling Fan Assembly is the easiest drop-in upgrade for direct drive systems.
4. 40mm High-Flow Axial Cooling Fan Budget Pick
Sometimes the simplest solution is the best one. A quality 40mm axial fan from a reputable manufacturer like Sunon or NMB can dramatically improve your printer stock cooling performance at a fraction of the cost of a specialized shroud. These fans are widely compatible with most FDM printers and can be installed in minutes.
Look for fans rated around 12V with airflow between 40 and 60 CFM (cubic feet per minute). Avoid ultra-cheap no-name fans because they tend to be noisy, have short lifespans, and deliver inconsistent airflow. The Sunon Maglev series is particularly recommended for its near-silent operation and 50,000+ hour lifespan.
Best for: Budget upgrades on any FDM printer; replacement fans for stock cooling assemblies
The Sunon 40mm High-Flow Axial Cooling Fan 12V is the best budget fan you can buy for any FDM printer.
5. Dual 40mm Part Cooling Fan Kit with Ducting
For users who want maximum cooling performance without buying a pre-built shroud, dual 40mm fan kits with custom ducting offer excellent value. These kits typically include two matched fans, a 3D-printed or metal mounting bracket, and flexible ducting that directs airflow precisely onto the print.
The advantage of this approach is flexibility you can mount the fans at any angle to optimize airflow for your specific printer geometry. Many users report that dual-fan setups with custom ducting outperform even expensive proprietary cooling systems because they can be fine-tuned for each individual machine.
Best for: Tinkerers and advanced users who want maximum customization
The Dual 40mm Part Cooling Fan Kit with Ducting gives you the most control over airflow direction and coverage.
Advanced Cooling Solutions for Demanding Applications
If you are pushing your printer to the limits printing at high speeds, using exotic filaments, or producing production-quality parts standard fans may not be enough. Here are advanced cooling solutions worth considering.
Active Part Cooling with PWM Control
PWM (Pulse Width Modulation) controlled fans allow you to vary fan speed from 0% to 100% through your slicer software. This means you can run the fan at full power for PLA and PETG, reduce it to 50-70% for ABS and ASA which need slower cooling to prevent warping, or turn it off entirely for materials like HIPS that require minimal part cooling.
Most modern slicers including PrusaSlicer, Cura, and Bambu Studio support per-material fan speed profiles. Pair this with a PWM-compatible fan like the Sunon Maglev PWM 40mm Cooling Fan and you have the most flexible cooling system available.
Nozzle-Jacket Cooling (Chill Block)
A nozzle-jacket cooling fan sometimes called a chill block fan blows air directly onto the heat break between the hotend heated zone and the cold zone. This prevents heat creep where filament softens too high up in the hotend and causes clogs especially when printing at high speeds or with flexible materials.
Heat creep is one of the most common causes of print failures on budget printers, and adding a dedicated nozzle-jacket cooling fan can eliminate this problem entirely. Look for fans specifically designed to mount around your heat break they typically use 20mm or 30mm form factors.
Enclosure Ventilation Systems
If you are printing ABS, ASA, PC, or other high-temperature materials in an enclosure proper ventilation is critical. A dual-fan ventilation system with carbon filtration removes harmful fumes while maintaining stable chamber temperatures. The air filtration guide covers these systems in detail.
Fan Speed Settings by Material: Quick Reference
Getting the right fan speed for each material is just as important as having good hardware. Here is a quick reference table to help you optimize your prints:
| Material | Fan Speed | Notes |
|---|---|---|
| PLA | 80-100% | Maximum cooling for crisp details and sharp overhangs |
| PETG | 50-70% | Too much cooling causes layer delamination; too little causes stringing |
| ABS | 0-20% | Minimal part cooling; focus on enclosure temperature instead |
| ASA | 0-10% | Similar to ABS but slightly more tolerant of moderate cooling |
| TPU / TPE | 20-40% | Moderate cooling helps with overhangs without affecting flexibility |
| Nylon | 0-30% | Low cooling preferred; use enclosure for temperature stability |
| HIPS | 0% | No part cooling needed; dissolvable support material does not benefit from it |
| PC (Polycarbonate) | 0-10% | Very low cooling; relies on heated chamber for proper layer bonding |
Installation Tips and Best Practices
Installing a new part cooling fan is straightforward, but following best practices ensures optimal performance.
Before You Start
- Power down completely: Unplug your printer before working on any electrical components.
- Document the existing setup: Take photos of how your stock fan is wired and mounted so you can reference them during installation.
- Check compatibility: Verify that your new fan matches your printers voltage (usually 12V or 24V) and connector type.
- Gather tools: You will typically need a small Phillips screwdriver, zip ties or cable clips, and possibly a soldering iron if you are splicing wires.
Mounting Position Matters
The position of your cooling fan relative to the nozzle is critical. The ideal setup directs airflow so that it hits the freshly extruded filament at a 45-degree angle, covering both sides of the print evenly. Too far from the nozzle and the air dissipates before reaching the plastic; too close and you risk interfering with filament feeding or causing uneven cooling.
For most printers, mounting the fan on the side opposite the filament entry point works best this ensures the airflow passes across the entire width of the extruded bead. If your printer uses a dual-fan shroud like the Bondtech, the factory alignment is usually spot-on right out of the box.
Wiring and Power
Most part cooling fans connect to the printers dedicated fan output on the mainboard (often labeled FAN or COOLING). If you are adding a second fan, use a Y-splitter cable or connect both fans in parallel to the same output. Ensure your power supply can handle the additional current draw two 40mm fans typically draw less than 1A combined, which is well within the capacity of any modern printers mainboard.
Common Cooling Problems and Solutions
Even with good hardware, cooling issues can arise. Here are the most common problems and how to fix them quickly.
Problem: Stringing Between Travel Moves
Cause: Insufficient part cooling or fan positioned too far from the nozzle.
Solution: Move the fan closer to the nozzle, increase fan speed in your slicer, or upgrade to a dual-fan shroud for more focused airflow.
Problem: Poor Overhang Quality
Cause: Fan not delivering enough air volume or airflow directed at the wrong angle.
Solution: Try a higher-CFM fan, adjust the shroud angle to target the overhang directly, and ensure your slicer is set to 100% fan speed for PLA.
Problem: Fan Noise Is Excessive
Cause: Cheap fans with poor bearings or fans running at unnecessarily high speeds.
Solution: Replace with a quality bearing fan (ball bearing or magnetic levitation). Consider PWM-controlled fans so you can reduce speed when full power is not needed.
Problem: Heat Creep and Clogging
Cause: Insufficient heat break cooling, especially on direct drive printers running at high speeds.
Solution: Add a dedicated nozzle-jacket cooling fan or upgrade to a hotend with an integrated chill block design like the E3D Revo.
Printer-Specific Cooling Recommendations
Different printer models have different stock cooling capabilities. Here are our recommendations for popular 2026 printers.
Creality Ender 3 Series
The stock Ender 3 fan is adequate but not great. Upgrading to a Bondtech Dual Part Cooling Fan for Ender 3 is one of the highest-value upgrades you can make. Pair it with a better hotend and you will see dramatic improvements in overhang quality and print speed.
Bambu Lab A1 / P1P Series
Bambu printers come with excellent stock cooling, but adding a Micro Swiss or third-party enhanced shroud can push performance even further. The enclosed design of the P1 series means you have less flexibility for modifications, so focus on slicer-level tuning rather than hardware swaps.
Prusa MK4 / Mini+
The Prusa MK4 has one of the best stock cooling systems in its class. If you want to squeeze out every last bit of performance, consider upgrading to a Bondtech dual fan or an E3D shroud for marginal improvements on very demanding prints.
Cost vs. Benefit Analysis
Not all cooling upgrades are created equal. Here is how they stack up in terms of value:
| Upgrade | Approximate Cost | Impact on Print Quality | Difficulty |
|---|---|---|---|
| Budget axial fan replacement | $8-15 | Moderate | Easy (5 minutes) |
| Dual 40mm fan kit with ducting | $20-35 | High | Medium (15-30 min) |
| Bondtech dual part cooling shroud | $30-45 | Very High | Easy-Medium (10-20 min) |
| E3D V6 hotend + integrated cooling | $50-70 | Very High | Medium-Hard (30-45 min) |
| PWM fan upgrade with slicer profiles | $15-25 | Moderate | Easy (requires slicer config) |
| Nozzle-jacket cooling fan | $8-15 | High (for heat creep issues) | Easy (5-10 min) |
Maintenance Tips for Long-Term Cooling Performance
Your cooling fans deserve regular attention to ensure they keep working at peak performance:
- Clean dust buildup monthly: Dust accumulation on fan blades reduces airflow by up to 30%. Use compressed air or a soft brush to clean the fan housing and shroud.
- Listen for bearing noise: A grinding or whining sound indicates worn bearings. Replace fans before they fail completely during a long print.
- Check mounting screws quarterly: Vibration from printer operation can loosen fan mounts over time, causing misalignment and reduced cooling efficiency.
- Test airflow annually: Hold a piece of tissue paper near the nozzle while the fan runs. If it does not flutter noticeably, your fan may be failing or clogged.
Conclusion: Do Not Underestimate Your Cooling Fan
Cooling is the unsung hero of great 3D prints. A well-designed part cooling system can transform a mediocre printer into one that produces crisp, detailed prints with clean overhangs and minimal post-processing. Whether you are on a tight budget and just need a better axial fan, or you want the absolute best with a Bondtech dual-fan shroud, investing in proper cooling is always worth it.
Start by evaluating your current setup if your prints have stringing issues, mushy overhangs, or poor detail reproduction a cooling upgrade is likely to deliver noticeable improvements. And remember that proper fan speed settings for each material are just as important as the hardware itself. Take time to tune your slicer profiles and you will be amazed at what your printer can produce.
For more essential upgrades, also check out our filament dryer guide because even the best cooling will not help if your filament is absorbing moisture from the air.
Related Articles
- Best Filament Dryers for 3D Printing in 2026
- Best 3D Printer Air Filtration and Enclosure Ventilation for 2026
- Best 3D Printer Bed Leveling Tools for Perfect First Layers in 2026
- 3D Printer Nozzles Explained: Brass vs Steel vs Ruby
Affiliate Disclosure: This post contains affiliate links to Amazon. If you purchase through these links, we may earn a small commission at no extra cost to you. This helps support our content. We only recommend products we genuinely believe in.