Sliding Dovetail Lid for 3D Printed Box: Complete Fusion 360 Tutorial
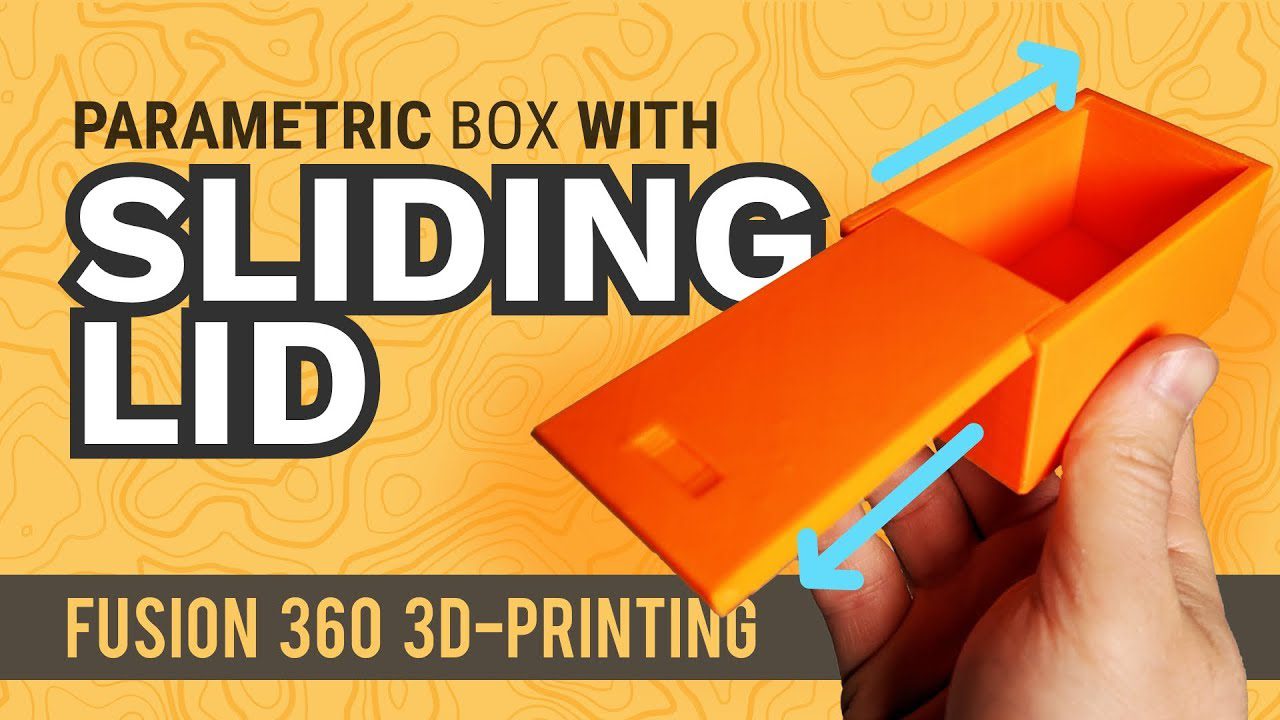
[youtube_video id=”HMtLqm5TkGE” title=”Sliding Dovetail Lid for 3D Printed Box | Fusion 360 Tutorial”]
Quick Answer: What is a Sliding Dovetail Lid?
A sliding dovetail lid is an advanced woodworking joint adapted for 3D printing that features a trapezoidal tongue on one piece that slides into a matching groove on another. This design provides excellent mechanical strength, self-alignment during assembly, and allows the lid to slide smoothly in and out without hardware. It’s particularly popular for 3D printed boxes because it combines traditional craftsmanship with parametric design capabilities.
- Introduction to Sliding Dovetail Joints
- Benefits of Sliding Dovetail Lids for 3D Printed Boxes
- Fusion 360 Design Tutorial: Step-by-Step
- Best Filament Choices for Sliding Dovetail Boxes
- Comparison: Sliding Dovetail vs. Other Lid Mechanisms
- Printing Tips for Successful Sliding Dovetail Joints
- Recommended Products for Sliding Dovetail Projects
- Frequently Asked Questions
- Conclusion
Introduction to Sliding Dovetail Joints
Sliding dovetail joints have been used in fine woodworking for centuries, prized for their strength and elegant appearance. The joint consists of a dovetail-shaped protrusion (the male part) that slides into a matching groove (the female part). Unlike traditional dovetails that are assembled at a 90-degree angle and permanently fixed, sliding dovetails allow linear movement while maintaining a secure connection [1].
When adapted for 3D printing, this joint becomes even more versatile. Using Fusion 360’s parametric design tools, you can create boxes with sliding dovetail lids that are perfectly sized for your specific needs—whether storing playing cards, SD cards, small tools, or collectibles. The design ensures the lid stays securely attached while allowing easy access to contents [2].
Benefits of Sliding Dovetail Lids for 3D Printed Boxes
The sliding dovetail design offers several distinct advantages over other box lid mechanisms:
- No Hardware Required: Unlike hinge-based lids, sliding dovetails require no screws, pins, or additional components—everything prints as a single piece.
- Self-Aligning: The trapezoidal shape naturally guides the lid into position, ensuring proper alignment every time.
- Secure Yet Removable: The mechanical interlock prevents accidental opening while allowing intentional removal when needed.
- Smooth Operation: When designed with proper tolerances, the lid glides smoothly without binding or excessive play.
- Professional Appearance: The visible dovetail detail adds an attractive woodworking aesthetic to 3D printed objects.
- Parametric Flexibility: Using Fusion 360 parameters, you can easily resize the box and joint for different purposes.
box_length– Overall length of the boxbox_width– Overall width of the boxbox_height– Height of the box wallslid_height– Thickness of the sliding lidwall_thickness– Thickness of box wallstolerance– Clearance for the sliding joint (typically 0.2-0.3mm)- Orientation Matters: Print the box with the dovetail groove oriented vertically to minimize support material and ensure the joint prints cleanly.
- Adjust Tolerance: If your lid is too tight, increase the tolerance parameter in 0.05mm increments. If too loose, decrease it.
- Wall Line Count: Use at least 3-4 wall lines for sufficient strength in the dovetail area.
- Infill Percentage: 20-30% infill is typically sufficient; higher infill doesn’t significantly improve joint strength.
- Cooling Settings: Ensure proper cooling to prevent overhang sagging on the dovetail’s underside surfaces.
- First Layer Quality: A well-adhered first layer is critical for dimensional accuracy of the entire joint.
- Post-Processing: Light sanding of mating surfaces can improve smoothness, but avoid removing too much material.
- eSun PETG 3D Printer Filament – Excellent PETG filament with consistent diameter and vibrant colors, perfect for functional boxes.
- Hatchbox PLA 3D Printer Filament – Premium PLA option for decorative boxes and prototypes where easy printing is priority.
- Autodesk Fusion 360 – The software used in this tutorial, offering free personal use for makers and hobbyists.
- Creality Ender 3 V2 3D Printer – Budget-friendly printer capable of excellent quality for this type of project.
- Calipers Digital Stainless Steel – Essential tool for measuring printed parts and verifying joint tolerances.
- Product Design Online – Sliding Dovetail Tutorial Resources
- Fusion 360 Beginner’s Checklist
- Top Fusion 360 Tutorials Playlist
- Fusion 360 Personal Use License
- ABS 3D Printing Settings Guide: Temperature, Enclosure, and Cooling for Strong Parts
- Best 3D Printer Upgrades That Actually Improve Print Quality: Complete 2026 Guide
- Creality Creality Ender 3 V3 Plus vs Creality Ender 3 Pro: Full Specs Comparison & Buyer’s Guide
- Best Budget 3D Printer Upgrades That Actually Improve Print Quality: Belts, Springs, Hotends & More
- Bambu Lab A1 vs Elegoo Centauri Carbon: Full Specs Comparison & Buyer’s Guide
Fusion 360 Design Tutorial: Step-by-Step
Step 1: Set Up Parameters
Begin by creating user parameters in Fusion 360. This parametric approach allows you to easily adjust dimensions later without rebuilding the entire model. Key parameters include:
Starting with a standard deck of cards box: Length: 95mm, Width: 65mm, Height: 30mm, Wall thickness: 2mm, Lid height: 8mm [3].
Step 2: Create the Box Base
Use the Rectangle tool on the top plane to create the box outline, using your box_length and box_width parameters. Extrude this profile by box_height to create the main box body. Apply a Shell operation with wall_thickness to hollow out the interior, leaving a solid bottom.
Create the dovetail groove by sketching a trapezoid on one of the interior walls. The groove should be lid_height deep and extend the full width of the box. Use an angle of 10-15 degrees for the dovetail taper—this provides good mechanical interlock while still allowing the lid to slide freely [4].
Step 3: Design the Sliding Lid
Create a new component for the lid. Sketch a rectangle matching the box width but slightly shorter than the box length (subtract about 1-2mm for finger clearance). Extrude to lid_height.
On the underside of the lid, sketch the matching dovetail tongue. This should be the inverse of the groove you created on the box—same height, same angle, but sized to fit within the groove with your specified tolerance. Remember to account for the tolerance on both sides of the tongue.
Step 4: Refine and Test
Use Fusion 360’s Joint or Assemble functionality to test the fit virtually before printing. Animate the sliding motion to ensure the lid can fully insert and remove without interference. If you notice binding, adjust the tolerance parameter and rebuild [5].
Best Filament Choices for Sliding Dovetail Boxes
Choosing the right filament is crucial for achieving smooth sliding action and long-term durability. Here’s a comparison of popular options:
| Filament | Pros | Cons | Best For |
|---|---|---|---|
| PLA | Easy to print, low warping, excellent surface finish, affordable | Lower heat resistance, can be brittle, may deform in hot environments | Display boxes, decorative items, indoor use |
| PETG | Good strength and impact resistance, food safe, moderate heat resistance | Stringing during printing, absorbs moisture, requires careful tuning | Functional boxes, items requiring durability |
| ABS | High heat resistance, excellent mechanical strength, chemical resistant | Requires heated bed and enclosure, strong fumes, warping issues | Workshop tools, high-temperature environments |
| TPU | Flexible and impact resistant, excellent for protective cases | Difficult to print, slow printing speed, poor dimensional accuracy | Protective cases, items needing flexibility |
For most sliding dovetail boxes, PETG offers the best balance of printability, durability, and smooth sliding characteristics. The slight flexibility helps the joint maintain proper clearance over time, while the material’s resistance to moisture absorption prevents swelling that could cause binding [6].
Comparison: Sliding Dovetail vs. Other Lid Mechanisms
Understanding how sliding dovetails compare to other common lid types helps you choose the best design for your project:
| Lid Type | Assembly | Hardware Needed | Removability | Print Difficulty | Smoothness |
|---|---|---|---|---|---|
| Sliding Dovetail | Press-fit slide | None | Excellent | Medium | Very Good |
| Friction Fit | Press fit | None | Good | Easy | Fair |
| Living Hinge | Integrated | None | N/A (attached) | Hard | Good |
| Pin Hinge | Insert pin | Pin required | Excellent | Medium | Good |
| Magnetic Closure | Glue magnets | Magnets, glue | Excellent | Easy | Excellent |
Printing Tips for Successful Sliding Dovetail Joints
Recommended Products for Sliding Dovetail Projects
Here are some Amazon products that work well for 3D printed sliding dovetail boxes:
Frequently Asked Questions
Q: What tolerance should I use for a sliding dovetail joint?
A: Start with 0.2-0.3mm total clearance (0.1-0.15mm on each side of the dovetail tongue). The ideal tolerance depends on your printer’s accuracy and the filament you’re using. PETG may need slightly more clearance than PLA due to its flexibility. Test prints with different tolerances will help you dial in the perfect fit for your specific setup.
Q: Why is my lid binding or not sliding smoothly?
A: Binding is usually caused by insufficient clearance, overextrusion, or first-layer squishing reducing the groove dimensions. Try increasing your tolerance parameter by 0.05mm, check your extrusion multiplier (aim for 95-100%), and ensure your first layer height isn’t compressing the bottom of the groove. Sometimes, light sanding of the dovetail surfaces can also help.
Q: Can I scale this design for different sized boxes?
A: Absolutely! That’s the beauty of parametric design in Fusion 360. See also: Best 3D Printer Upgrades That Actually Improve Pri…. Simply change your box_length and box_width parameters, and the entire model—including the dovetail joint—will update automatically. Just remember to maintain reasonable proportions relative to the joint size; extremely small boxes may require a scaled-down dovetail for practical printing.
Q: Do I need to use support material for the dovetail?
A: It depends on your orientation. If you print the box with the dovetail groove vertical (pointing up), you typically won’t need supports for the internal surfaces. However, if you print horizontally or at an angle, supports may be necessary. The lid’s dovetail tongue usually requires supports unless oriented carefully. Consider designing with a slight draft angle if you plan to print without supports.
Q: What’s the maximum size box I can make with this method?
A: The practical limit depends on your printer’s build volume. However, for larger boxes, consider using a multiple-dovetail design (two or more parallel dovetails) instead of a single wide one. This prevents warping issues and distributes the load more evenly. A single dovetail wider than 50-60mm may be prone to printing defects and reduced strength.
Q: Can I add a lock or latch to prevent accidental opening?
A: Yes! You can design a simple friction tab, magnet pocket, or mechanical latch into the lid or box body. A small tab that snaps into a corresponding recess when the lid is fully inserted provides effective retention while still allowing intentional removal. For a more secure solution, embed small neodymium magnets into both pieces—just account for their thickness in your design parameters.
Conclusion
Sliding dovetail lids combine the timeless elegance of traditional joinery with modern parametric design capabilities. Using Fusion 360, you can create custom boxes that are both functional and beautiful, with professional-quality mechanical connections that require no additional hardware. Whether you’re building storage for a deck of cards, electronics components, or small collectibles, the sliding dovetail approach offers a satisfying balance of strength, aesthetics, and ease of use.
The key to success lies in careful tolerance management, proper printing orientation, and choosing the right filament for your application. With practice, you’ll develop an intuitive sense for the perfect clearance and will be able to quickly adapt the design to whatever purpose you have in mind. Happy printing!
Additional Resources:
This article contains affiliate links. If you purchase through these links, I may earn a small commission at no additional cost to you. This helps support continued content creation.
Where to Buy
As an Amazon Associate, we earn from qualifying purchases.
📌 Related Articles