Frequently Asked Questions
What is 3d model a makercoin in fusion 360! 2019 updated tutorial?
Quick Answer: How to 3D Model a Makercoin in Fusion 360
Quick Summary: To 3D model a Makercoin in Fusion 360, follow these steps: (1) Set up Fusion 360 for 3D printing, (2) Create a base sketch and revolve it to form the coin shape, (3) Add custom designs using Inkscape to create SVG vectors, (4) Import the SVG into Fusion 360 as a sketch, (5) Use extrude cut to engrave your design, and (6) Export as. This topic is increasingly relevant in the 3D printing community as the technology continues to advance and become more accessible to hobbyists and professionals alike.
How does this relate to 3D printing?
This topic is directly connected to additive manufacturing and 3D printing technology. Understanding these concepts helps improve print quality, expand capabilities, and explore new applications for desktop and industrial 3D printing.
What are the practical applications?
The practical applications span from rapid prototyping and custom manufacturing to educational projects and functional parts production. These techniques can be applied with most consumer-grade and professional 3D printers available today.
Quick Answer: How to 3D Model a Makercoin in Fusion 360
Quick Summary: To 3D model a Makercoin in Fusion 360, follow these steps: (1) Set up Fusion 360 for 3D printing, (2) Create a base sketch and revolve it to form the coin shape, (3) Add custom designs using Inkscape to create SVG vectors, (4) Import the SVG into Fusion 360 as a sketch, (5) Use extrude cut to engrave your design, and (6) Export as .stl for 3D printing. This beginner-friendly project typically takes 30-60 minutes for the design phase and 1-2 hours for printing.
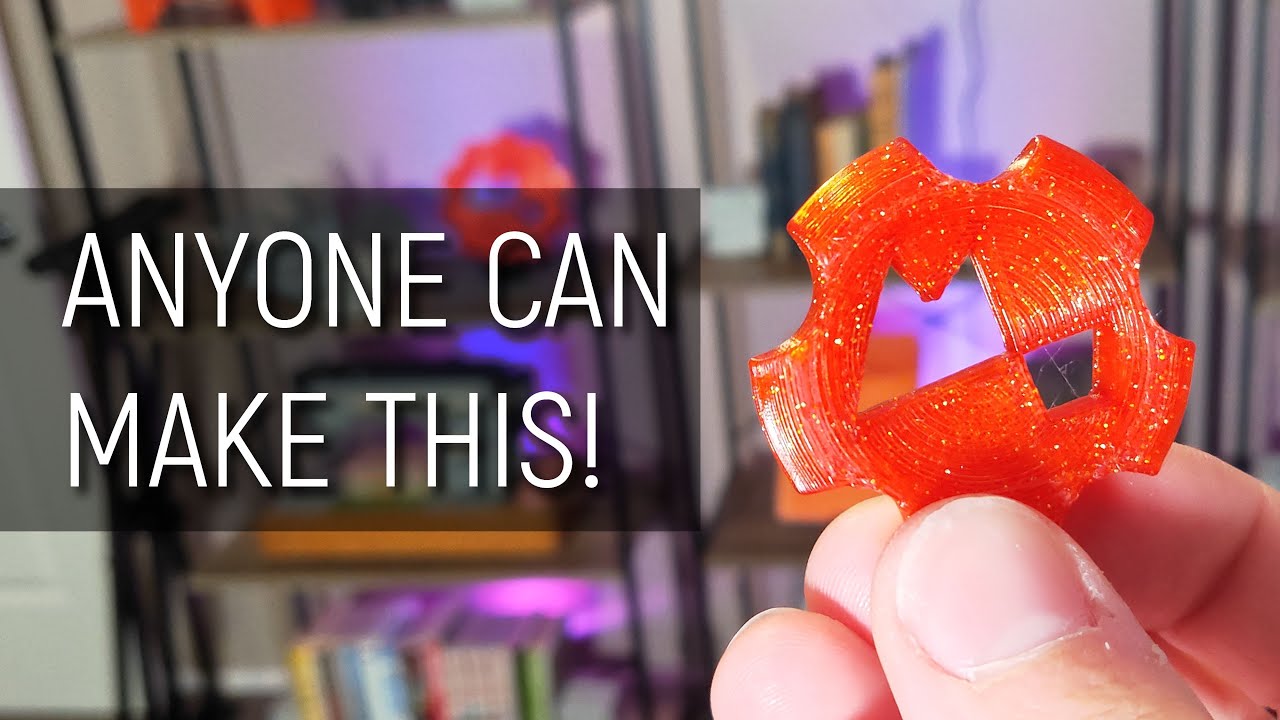
Introduction: What is a Makercoin?
A Makercoin is a custom-designed 3D printed challenge coin that represents your identity as a maker, hobbyist, or creative enthusiast. These personalized tokens have become popular in the 3D printing and maker communities as a way to showcase skills, connect with others, and leave a memorable souvenir at meetups, conferences, or maker spaces.
The concept originated from military challenge coins, which are traditionally given to unit members as symbols of camaraderie and achievement. In the maker community, Makercoins serve a similar purpose—they’re physical representations of your creative journey and technical abilities. Each coin can be uniquely designed with your name, logo, favorite tools, or any artwork that represents your maker identity.
Creating your own Makercoin is an excellent project for beginners because it introduces you to essential CAD (Computer-Aided Design) concepts while producing a tangible, rewarding result. You’ll learn about sketching, revolving, extruding, and working with imported vector graphics—all fundamental skills that transfer to more complex 3D modeling projects.
Tools You’ll Need
Before diving into the design process, gather the following software and tools. Fortunately, everything you need is available for free or at no cost for personal use:
- Fusion 360 – A powerful CAD/CAM software by Autodesk. The personal license is free for hobbyists and startups making less than $100,000 annually. Download from Autodesk’s website.
- Inkscape – A free, open-source vector graphics editor. You’ll use it to create or prepare SVG files for importing into Fusion 360. Download from inkscape.org.
- 3D Slicer Software – Such as Cura, PrusaSlicer, or Ultimaker Cura (free) to prepare your .stl file for 3D printing.
- A 3D Printer – Any FDM (Fused Deposition Modeling) printer will work. Popular beginner options include Ender 3, Prusa i3 MK3, or Creality CR-series printers.
- Filament – PLA is recommended for beginners due to its ease of use, but PETG offers better durability.
Fusion 360 vs Other CAD Software: Which is Best for Makercoins?
| Feature | Fusion 360 | TinkerCAD | SketchUp |
|---|---|---|---|
| Learning Curve | Moderate – Steeper than TinkerCAD but manageable for beginners | Very Easy – Drag-and-drop interface perfect for absolute beginners | Easy – Intuitive for architectural/sketching projects |
| Parametric Modeling | Yes – Full parametric design with history-based editing | No – Limited to basic shapes and transformations | Limited – Extensions available but not native |
| 3D Printing Prep | Excellent – Built-in .stl export and print settings | Basic – Simple export but limited control | Moderate – Requires plugins for optimal results |
| SVG Import | Yes – Direct import as sketches for complex designs | No – Limited shape options | Limited – Requires workarounds |
| Cost | Free for personal use (up to $100K revenue) | Free – Web-based, no account required | Free version available (web-based), Pro requires subscription |
For Makercoins specifically, Fusion 360 offers the best balance of power and accessibility. TinkerCAD is great for absolute beginners doing simple shapes, but you’ll quickly outgrow it. SketchUp excels at architectural modeling but lacks the parametric features that make Fusion 360 ideal for precise, editable designs.
Setting Up Fusion 360 for 3D Printing
Before you start modeling, configure Fusion 360 to ensure smooth 3D printing workflow:
- Create a New Design – Open Fusion 360 and click “New Design” from the home screen. This creates a fresh workspace with default units set to millimeters (mm), which is ideal for 3D printing.
- Set Document Units – Navigate to the “Document Settings” in the browser (the panel on the left) and ensure units are set to millimeters. 3D printers work in metric units, so this setting is crucial for accurate sizing.
- Choose a Workspace – Fusion 360 has multiple workspaces (Design, Render, Animation, etc.). Stay in the “Design” workspace for modeling. You can switch to “Render” later if you want to create realistic previews of your coin.
- Familiarize Yourself with Navigation – Learn the basic view controls: Mouse wheel to zoom, middle mouse button (or Shift + left click) to orbit, right-click + drag to pan. These are universal CAD navigation shortcuts you’ll use constantly.
- Enable Grid Snapping – Click the grid icon in the view cube area to enable grid snapping. This helps align your sketches precisely and prevents frustrating alignment issues later.
Understanding the Sketch Workflow
In Fusion 360, almost every 3D object starts with a 2D sketch. Think of sketches as the blueprint for your 3D model. Here’s how the workflow typically flows:
- Create a Sketch – Select a plane (XY, XZ, or YZ) and click “Create Sketch.” This opens a 2D drawing environment where you’ll draw shapes using lines, circles, arcs, and other geometric tools.
- Add Constraints – Apply geometric constraints (horizontal, vertical, coincident, tangent, etc.) to define relationships between sketch elements. Constraints ensure your design maintains its intended shape even if you change dimensions later.
- Add Dimensions – Specify exact measurements for your sketch elements. This is where parametric modeling shines—you can modify dimensions anytime, and the model updates automatically.
- Finish Sketch – Once your sketch is fully defined (black lines indicate a fully constrained sketch), click “Finish Sketch” to exit sketch mode and prepare for 3D operations.
- Apply 3D Features – Use tools like Extrude, Revolve, Loft, Sweep, or Fillet to transform your 2D sketch into a 3D object.
For a Makercoin, we’ll primarily use the Revolve feature (to create the coin’s circular shape from a profile sketch) and the Extrude Cut feature (to engrave designs from imported SVG files).
Step 1: Creating the Base Sketch for the Coin Shape
The first step is to create a profile sketch that defines the coin’s cross-section. We’ll use the Revolve feature to spin this profile around a center axis, creating a perfect coin shape.
- Start a New Sketch – Select the right plane (YZ plane) from the origin and click “Create Sketch.” This orientation makes it easy to draw the coin’s profile.
- Draw the Coin Profile – Using the Line tool (shortcut ‘L’), draw a profile that looks like half of a coin cross-section. Start at the origin (the center point where all three planes meet), draw a line up for the coin’s radius (typically 20-25mm), then draw the top edge (the coin’s thickness, usually 2-3mm), then draw down the outer edge, and finally back to the origin to close the shape.
- Add Fillets for Realism – Real coins have rounded edges, not sharp corners. Select the two corners where the top edge meets the vertical edges and click “Fillet” (shortcut ‘F’). Enter a fillet radius of 0.5-1mm to create smooth, coin-like edges.
- Dimension the Profile – Use the Dimension tool (shortcut ‘D’) to specify exact measurements. For a standard Makercoin, try these dimensions: 22mm radius (44mm diameter), 2.5mm thickness, and 1mm fillet radius.
- Fully Constrain the Sketch – Apply a coincident constraint between the bottom point and the origin, add vertical constraints to the vertical lines, and horizontal constraints to horizontal lines. When all lines turn black, your sketch is fully constrained.
- Finish Sketch – Click “Finish Sketch” in the toolbar to save your profile and exit sketch mode.
Step 2: Using the Revolve Feature to Create the Coin Body
Now that you have a profile sketch, transform it into a 3D coin shape using the Revolve feature:
- Select Revolve – Click “Revolve” in the Create menu or press ‘R’ to activate the tool.
- Select the Profile – Click on the profile sketch you created. Fusion 360 will highlight it and show a preview of the revolved shape.
- Choose the Axis – Click on the vertical line in your profile (the line that goes through the origin). This line becomes the axis of revolution—the line around which the profile spins.
- Set Angle to 360 Degrees – Ensure the angle is set to 360 degrees to create a complete circle. The default should be 360, but verify it in the dialog box.
- Click OK – Press Enter or click the green checkmark to complete the revolve operation. Your coin body is now a 3D object!
You should now see a perfect circular coin shape with rounded edges. This forms the base of your Makercoin. If you need to adjust the dimensions, simply edit the original sketch, and the revolved body will update automatically.
Step 3: Adding Raised Features with Extrude
Many Makercoins feature raised text, logos, or decorative elements on the face. Here’s how to add these using the Extrude feature:
- Create a Face Sketch – Select the flat face of your coin (either the top or bottom) and click “Create Sketch.” This opens a new sketch aligned with the coin’s surface.
- Import or Draw Your Design – You can either draw simple shapes directly (circles, text, patterns) or import an SVG file (more on this in the next section). For raised text, use the Text tool (shortcut ‘T’) and type your desired text.
- Position and Size Your Design – Move and resize elements to center them on the coin face. Use dimensions and constraints for precise placement.
- Finish Sketch – Click “Finish Sketch” to exit sketch mode.
- Extrude the Design – Select “Extrude” from the Create menu, click on your sketch elements, and drag upward to extrude them. Set the extrusion distance to 0.5-1mm for a subtle raised effect that will print clearly without causing layer adhesion issues.
- Click OK – Press Enter to complete the extrusion. Your design now stands raised from the coin surface.
Step 4: Creating Custom Designs with Inkscape
For complex logos, artwork, or intricate designs, Inkscape is your best friend. Here’s how to prepare custom graphics for your Makercoin:
- Download and Install Inkscape – If you haven’t already, download Inkscape from inkscape.org and install it on your computer.
- Create or Import Your Design – Open Inkscape and either draw your design from scratch using the vector tools (pen, shapes, text) or import an existing image (JPG, PNG) and trace it to convert it to vectors. Use the “Trace Bitmap” feature under the Path menu for this.
- Simplify and Optimize – Ensure your design consists of clean, closed paths. Remove unnecessary nodes using the “Simplify” function under the Path menu (Ctrl+L). Simple designs print better and are easier to edit in Fusion 360.
- Scale and Position – Resize your design to match your coin’s diameter (e.g., 40mm for a 44mm coin). Center it on the canvas using the alignment tools.
- Export as SVG – Go to File > Save As and select “SVG” as the file format. Choose a memorable location and name (e.g., “makercoin_logo.svg”).
Tip: For best results, use thick, bold lines and simple shapes. Extremely fine details may not print well on standard 3D printers. Aim for line weights of at least 0.5mm for reliable results.
Step 5: Importing SVG into Fusion 360 as a Sketch
Now bring your Inkscape design into Fusion 360 to engrave it onto your coin:
- Create a Face Sketch – Select the coin face where you want the design and click “Create Sketch.”
- Insert SVG – In the sketch toolbar, click “Insert” > “Insert SVG” (or right-click in the canvas and select “Insert DXF/DWG”). Navigate to your SVG file and open it.
- Position the SVG – The imported SVG will appear on your sketch plane. Move it to the desired location using the Move tool. Center it or offset it as needed for your design.
- Scale if Necessary – If the SVG is too large or small, use the Scale tool to resize it. You can also edit individual paths using the Sketch tools.
- Finish Sketch – Click “Finish Sketch” to lock in the imported design.
Important: If Fusion 360 fails to import the SVG, it may be due to complex paths or unsupported features. Try simplifying the design in Inkscape (use Path > Simplify) and try again. Alternatively, export as DXF format, which Fusion 360 handles more robustly.
Step 6: Engraving the Design with Extrude Cut
Transform your imported SVG into an engraved design on the coin surface:
- Select Extrude Cut – Click “Extrude” in the Create menu, then select the “Cut” operation from the dropdown menu (it looks like a downward arrow).
- Select the SVG Paths – Click on the imported SVG elements in your sketch. Fusion 360 will preview the cut operation.
- Set Cut Depth – Determine how deep you want the engraving to be. For Makercoins, 0.3-0.5mm is usually ideal—deep enough to be visible and tactile, but shallow enough to print cleanly without bridging issues.
- Direction – Ensure the cut direction points into the coin body (downward). The preview should show the material being removed.
- Click OK – Press Enter to complete the cut. Your custom design is now engraved into the coin surface!
You can repeat this process on both sides of the coin to create front and back designs. Many makers put a name or logo on one side and contact information or a meaningful quote on the other.
Step 7: Exporting as .STL for 3D Printing
Once your Makercoin design is complete, export it for 3D printing:
- Select the Body – Click on the coin body in the browser or directly in the canvas to select it.
- Initiate Export – Right-click and select “Save as STL” or go to File > Export and choose STL format.
- Adjust Export Settings – Set the mesh refinement to “High” for smooth curves. Higher refinement means more triangles and a larger file size, but better quality. The default settings are usually fine for Makercoins.
- Choose Units – Ensure export units are set to millimeters to match your design units.
- Save the File – Name your file (e.g., “makercoin_v1.stl”) and save it to a memorable location.
Your .stl file is now ready to import into slicer software for 3D printing preparation.
Choosing Filament: PLA vs PETG for Makercoins
| Characteristic | PLA (Polylactic Acid) | PETG (Polyethylene Terephthalate Glycol) |
|---|---|---|
| Print Temperature | 190-220°C – Lower temps, easier to dial in | 230-250°C – Higher temps require more tuning |
| Bed Temperature | 0-60°C – Often prints without heated bed | 70-80°C – Heated bed essential for adhesion |
| Durability | Brittle – Can crack if dropped or bent | Flexible – Resistant to impact and bending |
| Weather Resistance | Poor – Deforms in hot cars or direct sunlight | Good – Withstands higher temperatures and UV exposure |
| Surface Finish | Glossy and smooth – Excellent visual quality | Slightly matte – Good finish but less glossy than PLA |
| Difficulty | Easy – Most forgiving filament for beginners | Moderate – Stringing and overhangs require more attention |
| Cost | Low – Widely available and inexpensive | Moderate – Slightly more expensive than PLA |
For Makercoins, PLA is recommended for beginners due to its ease of use and excellent surface finish. If you plan to carry your coins in pockets or give them away frequently, consider PETG for better durability and heat resistance. For display pieces or casual giveaways, PLA works perfectly fine.
Slicer Settings for Quality Makercoin Prints
When importing your .stl into slicer software (Cura, PrusaSlicer, etc.), use these optimized settings for best results:
- Layer Height – 0.1-0.2mm. Smaller layer heights (0.1mm) produce smoother curves on the coin’s edge but take longer. 0.2mm is a good balance of speed and quality.
- Infill – 100% for maximum durability, or 80% if you want to save filament. Makercoins are small, so the filament difference is minimal even at 100%.
- Print Speed – 40-60mm/s for the outer walls and 80-100mm/s for infill. Slower outer wall speeds improve surface finish on the engraved designs.
- Brim or Raft – Use a brim of 3-5 lines to improve bed adhesion, especially for larger coins. Rafts are unnecessary and difficult to remove from flat coins.
- Supports – Generally not needed for Makercoins unless you have overhangs. If your design has bridges, enable supports with a support angle of 45 degrees.
- Travel Speed – 120-150mm/s. Faster travel speeds reduce stringing.
- Retraction – Enable retraction with a distance of 4-6mm and speed of 40-60mm/s to minimize stringing on multi-material prints.
- Cooling – 100% fan speed after the first few layers. Good cooling is essential for sharp edges and accurate engraving.
Troubleshooting Common Issues
Engraved Details Not Printing Clearly
Cause: Layer height too large, nozzle diameter too large, or details too fine.
Solution: Reduce layer height to 0.1mm or smaller, use a 0.4mm or smaller nozzle, and simplify your design in Inkscape (increase line thickness).
Coin Warping or Not Sticking to Bed
Cause: Bed temperature too low, bed not level, or lack of adhesion aids.
Solution: Increase bed temperature (PLA: 60°C, PETG: 80°C), ensure bed is level, and use a brim or adhesion aids like glue stick, hairspray, or PEI sheet.
Stringing Between Raised Elements
Cause: Retraction settings not optimized or travel speed too slow.
Solution: Enable retraction with 5mm distance, 50mm/s speed, and set travel speed to 150mm/s. Also check your filament is dry (wet filament causes stringing).
Rough Surface Finish on Engraving
Cause: Insufficient cooling or print speed too high.
Solution: Increase cooling fan to 100%, reduce outer wall print speed to 30-40mm/s, and ensure the first layer is not extruded too thick.
Coin Layers Separating
Cause: Print temperature too low or insufficient flow.
Solution: Increase nozzle temperature by 5-10°C and verify extrusion flow rate is calibrated. Also check filament diameter matches slicer settings.
Tips for Professional-Looking Makercoins
- Design for Printability – Before modeling, consider the printing process. Avoid designs with extremely thin walls (less than 1mm) or fine details that won’t resolve on a 0.4mm nozzle.
- Use Contrast Colors – If printing multi-color coins (using filament change or multi-material printer), choose high-contrast colors for maximum visibility of engraved details.
- Add a Border – A thin decorative border around the edge adds professional polish and can hide minor print imperfections.
- Test Print First – Always print a small test version (scale to 50%) to check details and dimensions before committing to a full-size print.
- Post-Process – Sand rough edges with fine-grit sandpaper (400-600 grit) for a smooth finish. You can also apply a clear coat or paint for extra durability and aesthetics.
- Version Control – Keep track of design iterations (makercoin_v1, makercoin_v2, etc.) in Fusion 360 using the “Save As” feature. This makes it easy to refine designs over time.
- Document Your Design – Take screenshots or export rendered images from Fusion 360 to document your designs. This is helpful for sharing on social media or recreating lost designs.
Advanced Techniques to Explore
Once you’ve mastered the basic Makercoin, try these advanced techniques to elevate your designs:
- Multi-Color Printing – Use filament change mid-print or a multi-material printer to create coins with multiple colors. For more on this topic, see our guide on Creality Creality Ender 3 V3 Plus vs Cre…. Change filament at the layer where your engraving ends to create a contrasting background.
- Textured Surfaces – Add texture to the coin face using the “Offset” and “Fillet” tools to create raised patterns like dimples, lines, or geometric shapes.
- Embedded QR Codes – Import a QR code as an SVG and engrave it onto your coin. This can link to your portfolio, website, or contact information.
- Variable Thickness – Create a coin that’s thicker in the center and thinner at the edges for a more ergonomic grip. Use the “Sweep” or “Loft” tools instead of simple Revolve.
- Multi-Part Assembly – Design coins that snap together or contain hidden compartments. This requires planning for tolerances and may need iterative prototyping.
Frequently Asked Questions (FAQ)
Q1: How long does it take to design a Makercoin from scratch?
A: For beginners, expect 30-60 minutes to complete the basic coin shape and simple engraving. Adding custom SVG designs or complex raised text can add another 30-60 minutes. With practice, experienced makers can design a full Makercoin in under 30 minutes. The timeline also depends on the complexity of your design—simple text or logos are quick, while intricate multi-layered patterns take longer.
Q2: Can I use a logo from my company or brand on a Makercoin?
A: Yes, provided you have the legal right to use the logo. If you own the company or have explicit permission, you can import the logo into Inkscape, convert it to vectors (or trace it from an image), and use it as an SVG in Fusion 360. Always respect copyright and trademark laws when creating designs for distribution or sale.
Q3: What’s the ideal size for a Makercoin?
A: The standard Makercoin size is 40-50mm in diameter (similar to a poker chip) with a thickness of 2-3mm. This size fits comfortably in hand, prints relatively quickly (typically 30-60 minutes), and provides enough surface area for detailed engravings. Smaller coins (30-35mm) are good for keychains, while larger coins (60mm+) make impressive display pieces but take longer to print.
Q4: Do I need a 3D printer to make a Makercoin, or can I outsource printing?
A: While having your own 3D printer is convenient, it’s not required. You can outsource printing to online services like Shapeways, 3DHubs, or local maker spaces. Simply export your .stl file from Fusion 360 and upload it to a printing service. This is a great option if you want to prototype designs before investing in a printer or if you need high-quality prints with professional materials like metal or resin.
Q5: Why won’t my SVG import into Fusion 360?
A: Common reasons include: (1) The SVG contains unsupported features like gradients or filters—remove these in Inkscape, (2) Paths are too complex or contain too many nodes—use Path > Simplify to reduce complexity, (3) The file is corrupted or not a valid SVG—try exporting as DXF instead, which Fusion 360 handles more reliably, or (4) The SVG file is too large—try importing a simpler version first to verify the process works.
Q6: How many Makercoins can I print from a single roll of filament?
A: A standard 1kg roll of 1.75mm filament (approximately 330 meters) can produce 150-200 standard-size Makercoins (40mm diameter, 2.5mm thick) at 100% infill. Each coin uses approximately 5-7 grams of filament. This makes Makercoins an excellent project for using up leftover filament scraps from larger prints.
Q7: Can I sell Makercoins with my designs?
A: Yes, you can sell physical Makercoins you print, provided you own the intellectual property rights to the designs. However, you cannot redistribute or sell the design files (.stl, .f3d, etc.) unless you explicitly created them and hold all rights. Always check licensing terms for any third-party assets (fonts, logos, vector graphics) you incorporate into your designs. For business use, consider the commercial implications of distributing branded items.
Q8: What’s the difference between a Makercoin and a 3D printed medallion?
A: The terms are often used interchangeably, but Makercoins specifically refer to challenge coins in the maker community tradition—personalized tokens representing maker identity and skills. Medallions is a broader term for any commemorative 3D printed disc. Makercoins typically feature maker-specific imagery (tools, software logos, QR codes), while medallions may commemorate events, achievements, or organizations. Both follow similar design and printing processes.
Video Tutorial: Step-by-Step Walkthrough
For visual learners, here’s a comprehensive video tutorial covering the entire Makercoin creation process:
Video Timestamps for Quick Reference
- 0:53 – Software overview and introduction
- 1:24 – Setting up Fusion 360 for 3D printing
- 3:17 – Sketch workflow explained
- 3:54 – Creating the first sketch (for revolve)
- 10:07 – Revolve feature demonstration
- 11:47 – Extrude sketch basics
- 13:57 – Extrude feature in action
- 14:49 – Circular pattern technique
- 17:35 – Creating SVG vectors using Inkscape
- 18:53 – Importing .svg into Fusion 360 as a sketch
- 20:47 – Extrude cut using imported .svg
- 22:32 – Exporting as .stl for 3D printing
Additional Resources and Learning Materials
- Fusion 360 Official Tutorials – https://www.autodesk.com/products/fusion-360/overview
- Inkscape Documentation – https://inkscape.org
- CAD For Newbies Playlist (YouTube) – Full series covering Fusion 360 basics
- Image to SVG Conversion Tutorial – https://youtu.be/CVgDbsglhyo
- 3D Printing Tips and Tricks Guide – https://gumroad.com/l/QWAh
- Essential 3D Printing Resources – https://www.amazon.com/shop/makersmuse
- Maker’s Muse Patreon – Support the creator of this tutorial at https://www.patreon.com/makersmuse?ty=h
Conclusion
Creating your own Makercoin in Fusion 360 is more than just a 3D printing project—it’s a journey into the world of CAD design that opens doors to endless creative possibilities. By following this comprehensive guide, you’ve learned essential skills that apply to countless other projects, from custom mechanical parts to artistic sculptures.
Remember that iteration is part of the process. Your first Makercoin may not be perfect, and that’s okay. Each design teaches you something new about Fusion 360, 3D printing, and your own creative preferences. Keep refining, experimenting, and pushing your skills forward.
Makercoins make excellent gifts, conversation starters, and networking tools in the maker community. They’re tangible proof of your abilities and a fun way to connect with fellow enthusiasts. Consider printing extras to give away at maker fairs, meetups, or conferences.
Now that you’ve mastered the basics, challenge yourself with advanced techniques like multi-color printing, embedded electronics (LEDs in transparent coins), or creating series of coins with evolving designs. The only limit is your imagination and willingness to learn.
Happy making, and may your prints always succeed on the first try!
📌 Related Articles
- Best 3D Printer Upgrades That Actually Improve Print Quality: Complete 2026 Guide
- Creality Creality Ender 3 V3 Plus vs Creality Ender 3 Pro: Full Specs Comparison & Buyer’s Guide
- ABS 3D Printing Settings Guide: Temperature, Enclosure, and Cooling for Strong Parts
- Best Budget 3D Printer Upgrades That Actually Improve Print Quality: Belts, Springs, Hotends & More
- The Current State of Metal 3D Printing in 2020
Where to Buy
Looking for Frequently Asked Questions
What is 3d model a makercoin in fusion 360! 2019 updated tutorial?
Quick Answer: How to 3D Model a Makercoin in Fusion 360
Quick Summary: To 3D model a Makercoin in Fusion 360, follow these steps: (1) Set up Fusion 360 for 3D printing, (2) Create a base sketch and revolve it to form the coin shape, (3) Add custom designs using Inkscape to create SVG vectors, (4) Import the SVG into Fusion 360 as a sketch, (5) Use extrude cut to engrave your design, and (6) Export as. This topic is increasingly relevant in the 3D printing community as the technology continues to advance and become more accessible to hobbyists and professionals alike.
How does this relate to 3D printing?
This topic is directly connected to additive manufacturing and 3D printing technology. Understanding these concepts helps improve print quality, expand capabilities, and explore new applications for desktop and industrial 3D printing.
What are the practical applications?
The practical applications span from rapid prototyping and custom manufacturing to educational projects and functional parts production. These techniques can be applied with most consumer-grade and professional 3D printers available today.
Quick Answer: How to 3D Model a Makercoin in Fusion 360
Quick Summary: To 3D model a Makercoin in Fusion 360, follow these steps: (1) Set up Fusion 360 for 3D printing, (2) Create a base sketch and revolve it to form the coin shape, (3) Add custom designs using Inkscape to create SVG vectors, (4) Import the SVG into Fusion 360 as a sketch, (5) Use extrude cut to engrave your design, and (6) Export as .stl for 3D printing. This beginner-friendly project typically takes 30-60 minutes for the design phase and 1-2 hours for printing.
Introduction: What is a Makercoin?
A Makercoin is a custom-designed 3D printed challenge coin that represents your identity as a maker, hobbyist, or creative enthusiast. These personalized tokens have become popular in the 3D printing and maker communities as a way to showcase skills, connect with others, and leave a memorable souvenir at meetups, conferences, or maker spaces.
The concept originated from military challenge coins, which are traditionally given to unit members as symbols of camaraderie and achievement. In the maker community, Makercoins serve a similar purpose—they’re physical representations of your creative journey and technical abilities. Each coin can be uniquely designed with your name, logo, favorite tools, or any artwork that represents your maker identity.
Creating your own Makercoin is an excellent project for beginners because it introduces you to essential CAD (Computer-Aided Design) concepts while producing a tangible, rewarding result. You’ll learn about sketching, revolving, extruding, and working with imported vector graphics—all fundamental skills that transfer to more complex 3D modeling projects.
Tools You’ll Need
Before diving into the design process, gather the following software and tools. Fortunately, everything you need is available for free or at no cost for personal use:
Fusion 360 – A powerful CAD/CAM software by Autodesk. The personal license is free for hobbyists and startups making less than $100,000 annually. Download from Autodesk’s website.
Inkscape – A free, open-source vector graphics editor. You’ll use it to create or prepare SVG files for importing into Fusion 360. Download from inkscape.org.
3D Slicer Software – Such as Cura, PrusaSlicer, or Ultimaker Cura (free) to prepare your .stl file for 3D printing.
A 3D Printer – Any FDM (Fused Deposition Modeling) printer will work. Popular beginner options include Ender 3, Prusa i3 MK3, or Creality CR-series printers.
Filament – PLA is recommended for beginners due to its ease of use, but PETG offers better durability.
Fusion 360 vs Other CAD Software: Which is Best for Makercoins?
Feature
Fusion 360
TinkerCAD
SketchUp
Learning Curve
Moderate – Steeper than TinkerCAD but manageable for beginners
Very Easy – Drag-and-drop interface perfect for absolute beginners
Easy – Intuitive for architectural/sketching projects
Parametric Modeling
Yes – Full parametric design with history-based editing
No – Limited to basic shapes and transformations
Limited – Extensions available but not native
3D Printing Prep
Excellent – Built-in .stl export and print settings
Basic – Simple export but limited control
Moderate – Requires plugins for optimal results
SVG Import
Yes – Direct import as sketches for complex designs
No – Limited shape options
Limited – Requires workarounds
Cost
Free for personal use (up to $100K revenue)
Free – Web-based, no account required
Free version available (web-based), Pro requires subscription
For Makercoins specifically, Fusion 360 offers the best balance of power and accessibility. TinkerCAD is great for absolute beginners doing simple shapes, but you’ll quickly outgrow it. SketchUp excels at architectural modeling but lacks the parametric features that make Fusion 360 ideal for precise, editable designs.
Setting Up Fusion 360 for 3D Printing
Before you start modeling, configure Fusion 360 to ensure smooth 3D printing workflow:
Create a New Design – Open Fusion 360 and click “New Design” from the home screen. This creates a fresh workspace with default units set to millimeters (mm), which is ideal for 3D printing.
Set Document Units – Navigate to the “Document Settings” in the browser (the panel on the left) and ensure units are set to millimeters. 3D printers work in metric units, so this setting is crucial for accurate sizing.
Choose a Workspace – Fusion 360 has multiple workspaces (Design, Render, Animation, etc.). Stay in the “Design” workspace for modeling. You can switch to “Render” later if you want to create realistic previews of your coin.
Familiarize Yourself with Navigation – Learn the basic view controls: Mouse wheel to zoom, middle mouse button (or Shift + left click) to orbit, right-click + drag to pan. These are universal CAD navigation shortcuts you’ll use constantly.
Enable Grid Snapping – Click the grid icon in the view cube area to enable grid snapping. This helps align your sketches precisely and prevents frustrating alignment issues later.
Understanding the Sketch Workflow
In Fusion 360, almost every 3D object starts with a 2D sketch. Think of sketches as the blueprint for your 3D model. Here’s how the workflow typically flows:
Create a Sketch – Select a plane (XY, XZ, or YZ) and click “Create Sketch.” This opens a 2D drawing environment where you’ll draw shapes using lines, circles, arcs, and other geometric tools.
Add Constraints – Apply geometric constraints (horizontal, vertical, coincident, tangent, etc.) to define relationships between sketch elements. Constraints ensure your design maintains its intended shape even if you change dimensions later.
Add Dimensions – Specify exact measurements for your sketch elements. This is where parametric modeling shines—you can modify dimensions anytime, and the model updates automatically.
Finish Sketch – Once your sketch is fully defined (black lines indicate a fully constrained sketch), click “Finish Sketch” to exit sketch mode and prepare for 3D operations.
Apply 3D Features – Use tools like Extrude, Revolve, Loft, Sweep, or Fillet to transform your 2D sketch into a 3D object.
For a Makercoin, we’ll primarily use the Revolve feature (to create the coin’s circular shape from a profile sketch) and the Extrude Cut feature (to engrave designs from imported SVG files).
Step 1: Creating the Base Sketch for the Coin Shape
The first step is to create a profile sketch that defines the coin’s cross-section. We’ll use the Revolve feature to spin this profile around a center axis, creating a perfect coin shape.
Start a New Sketch – Select the right plane (YZ plane) from the origin and click “Create Sketch.” This orientation makes it easy to draw the coin’s profile.
Draw the Coin Profile – Using the Line tool (shortcut ‘L’), draw a profile that looks like half of a coin cross-section. Start at the origin (the center point where all three planes meet), draw a line up for the coin’s radius (typically 20-25mm), then draw the top edge (the coin’s thickness, usually 2-3mm), then draw down the outer edge, and finally back to the origin to close the shape.
Add Fillets for Realism – Real coins have rounded edges, not sharp corners. Select the two corners where the top edge meets the vertical edges and click “Fillet” (shortcut ‘F’). Enter a fillet radius of 0.5-1mm to create smooth, coin-like edges.
Dimension the Profile – Use the Dimension tool (shortcut ‘D’) to specify exact measurements. For a standard Makercoin, try these dimensions: 22mm radius (44mm diameter), 2.5mm thickness, and 1mm fillet radius.
Fully Constrain the Sketch – Apply a coincident constraint between the bottom point and the origin, add vertical constraints to the vertical lines, and horizontal constraints to horizontal lines. When all lines turn black, your sketch is fully constrained.
Finish Sketch – Click “Finish Sketch” in the toolbar to save your profile and exit sketch mode.
Step 2: Using the Revolve Feature to Create the Coin Body
Now that you have a profile sketch, transform it into a 3D coin shape using the Revolve feature:
Select Revolve – Click “Revolve” in the Create menu or press ‘R’ to activate the tool.
Select the Profile – Click on the profile sketch you created. Fusion 360 will highlight it and show a preview of the revolved shape.
Choose the Axis – Click on the vertical line in your profile (the line that goes through the origin). This line becomes the axis of revolution—the line around which the profile spins.
Set Angle to 360 Degrees – Ensure the angle is set to 360 degrees to create a complete circle. The default should be 360, but verify it in the dialog box.
Click OK – Press Enter or click the green checkmark to complete the revolve operation. Your coin body is now a 3D object!
You should now see a perfect circular coin shape with rounded edges. This forms the base of your Makercoin. If you need to adjust the dimensions, simply edit the original sketch, and the revolved body will update automatically.
Step 3: Adding Raised Features with Extrude
Many Makercoins feature raised text, logos, or decorative elements on the face. Here’s how to add these using the Extrude feature:
Create a Face Sketch – Select the flat face of your coin (either the top or bottom) and click “Create Sketch.” This opens a new sketch aligned with the coin’s surface.
Import or Draw Your Design – You can either draw simple shapes directly (circles, text, patterns) or import an SVG file (more on this in the next section). For raised text, use the Text tool (shortcut ‘T’) and type your desired text.
Position and Size Your Design – Move and resize elements to center them on the coin face. Use dimensions and constraints for precise placement.
Finish Sketch – Click “Finish Sketch” to exit sketch mode.
Extrude the Design – Select “Extrude” from the Create menu, click on your sketch elements, and drag upward to extrude them. Set the extrusion distance to 0.5-1mm for a subtle raised effect that will print clearly without causing layer adhesion issues.
Click OK – Press Enter to complete the extrusion. Your design now stands raised from the coin surface.
Step 4: Creating Custom Designs with Inkscape
For complex logos, artwork, or intricate designs, Inkscape is your best friend. Here’s how to prepare custom graphics for your Makercoin:
Download and Install Inkscape – If you haven’t already, download Inkscape from inkscape.org and install it on your computer.
Create or Import Your Design – Open Inkscape and either draw your design from scratch using the vector tools (pen, shapes, text) or import an existing image (JPG, PNG) and trace it to convert it to vectors. Use the “Trace Bitmap” feature under the Path menu for this.
Simplify and Optimize – Ensure your design consists of clean, closed paths. Remove unnecessary nodes using the “Simplify” function under the Path menu (Ctrl+L). Simple designs print better and are easier to edit in Fusion 360.
Scale and Position – Resize your design to match your coin’s diameter (e.g., 40mm for a 44mm coin). Center it on the canvas using the alignment tools.
Export as SVG – Go to File > Save As and select “SVG” as the file format. Choose a memorable location and name (e.g., “makercoin_logo.svg”).
Tip: For best results, use thick, bold lines and simple shapes. Extremely fine details may not print well on standard 3D printers. Aim for line weights of at least 0.5mm for reliable results.
Step 5: Importing SVG into Fusion 360 as a Sketch
Now bring your Inkscape design into Fusion 360 to engrave it onto your coin:
Create a Face Sketch – Select the coin face where you want the design and click “Create Sketch.”
Insert SVG – In the sketch toolbar, click “Insert” > “Insert SVG” (or right-click in the canvas and select “Insert DXF/DWG”). Navigate to your SVG file and open it.
Position the SVG – The imported SVG will appear on your sketch plane. Move it to the desired location using the Move tool. Center it or offset it as needed for your design.
Scale if Necessary – If the SVG is too large or small, use the Scale tool to resize it. You can also edit individual paths using the Sketch tools.
Finish Sketch – Click “Finish Sketch” to lock in the imported design.
Important: If Fusion 360 fails to import the SVG, it may be due to complex paths or unsupported features. Try simplifying the design in Inkscape (use Path > Simplify) and try again. Alternatively, export as DXF format, which Fusion 360 handles more robustly.
Step 6: Engraving the Design with Extrude Cut
Transform your imported SVG into an engraved design on the coin surface:
Select Extrude Cut – Click “Extrude” in the Create menu, then select the “Cut” operation from the dropdown menu (it looks like a downward arrow).
Select the SVG Paths – Click on the imported SVG elements in your sketch. Fusion 360 will preview the cut operation.
Set Cut Depth – Determine how deep you want the engraving to be. For Makercoins, 0.3-0.5mm is usually ideal—deep enough to be visible and tactile, but shallow enough to print cleanly without bridging issues.
Direction – Ensure the cut direction points into the coin body (downward). The preview should show the material being removed.
Click OK – Press Enter to complete the cut. Your custom design is now engraved into the coin surface!
You can repeat this process on both sides of the coin to create front and back designs. Many makers put a name or logo on one side and contact information or a meaningful quote on the other.
Step 7: Exporting as .STL for 3D Printing
Once your Makercoin design is complete, export it for 3D printing:
Select the Body – Click on the coin body in the browser or directly in the canvas to select it.
Initiate Export – Right-click and select “Save as STL” or go to File > Export and choose STL format.
Adjust Export Settings – Set the mesh refinement to “High” for smooth curves. Higher refinement means more triangles and a larger file size, but better quality. The default settings are usually fine for Makercoins.
Choose Units – Ensure export units are set to millimeters to match your design units.
Save the File – Name your file (e.g., “makercoin_v1.stl”) and save it to a memorable location.
Your .stl file is now ready to import into slicer software for 3D printing preparation.
Choosing Filament: PLA vs PETG for Makercoins
Characteristic
PLA (Polylactic Acid)
PETG (Polyethylene Terephthalate Glycol)
Print Temperature
190-220°C – Lower temps, easier to dial in
230-250°C – Higher temps require more tuning
Bed Temperature
0-60°C – Often prints without heated bed
70-80°C – Heated bed essential for adhesion
Durability
Brittle – Can crack if dropped or bent
Flexible – Resistant to impact and bending
Weather Resistance
Poor – Deforms in hot cars or direct sunlight
Good – Withstands higher temperatures and UV exposure
Surface Finish
Glossy and smooth – Excellent visual quality
Slightly matte – Good finish but less glossy than PLA
Difficulty
Easy – Most forgiving filament for beginners
Moderate – Stringing and overhangs require more attention
Cost
Low – Widely available and inexpensive
Moderate – Slightly more expensive than PLA
For Makercoins, PLA is recommended for beginners due to its ease of use and excellent surface finish. If you plan to carry your coins in pockets or give them away frequently, consider PETG for better durability and heat resistance. For display pieces or casual giveaways, PLA works perfectly fine.
Slicer Settings for Quality Makercoin Prints
When importing your .stl into slicer software (Cura, PrusaSlicer, etc.), use these optimized settings for best results:
Layer Height – 0.1-0.2mm. Smaller layer heights (0.1mm) produce smoother curves on the coin’s edge but take longer. 0.2mm is a good balance of speed and quality.
Infill – 100% for maximum durability, or 80% if you want to save filament. Makercoins are small, so the filament difference is minimal even at 100%.
Print Speed – 40-60mm/s for the outer walls and 80-100mm/s for infill. Slower outer wall speeds improve surface finish on the engraved designs.
Brim or Raft – Use a brim of 3-5 lines to improve bed adhesion, especially for larger coins. Rafts are unnecessary and difficult to remove from flat coins.
Supports – Generally not needed for Makercoins unless you have overhangs. If your design has bridges, enable supports with a support angle of 45 degrees.
Travel Speed – 120-150mm/s. Faster travel speeds reduce stringing.
Retraction – Enable retraction with a distance of 4-6mm and speed of 40-60mm/s to minimize stringing on multi-material prints.
Cooling – 100% fan speed after the first few layers. Good cooling is essential for sharp edges and accurate engraving.
Troubleshooting Common Issues
Engraved Details Not Printing Clearly
Cause: Layer height too large, nozzle diameter too large, or details too fine.
Solution: Reduce layer height to 0.1mm or smaller, use a 0.4mm or smaller nozzle, and simplify your design in Inkscape (increase line thickness).
Coin Warping or Not Sticking to Bed
Cause: Bed temperature too low, bed not level, or lack of adhesion aids.
Solution: Increase bed temperature (PLA: 60°C, PETG: 80°C), ensure bed is level, and use a brim or adhesion aids like glue stick, hairspray, or PEI sheet.
Stringing Between Raised Elements
Cause: Retraction settings not optimized or travel speed too slow.
Solution: Enable retraction with 5mm distance, 50mm/s speed, and set travel speed to 150mm/s. Also check your filament is dry (wet filament causes stringing).
Rough Surface Finish on Engraving
Cause: Insufficient cooling or print speed too high.
Solution: Increase cooling fan to 100%, reduce outer wall print speed to 30-40mm/s, and ensure the first layer is not extruded too thick.
Coin Layers Separating
Cause: Print temperature too low or insufficient flow.
Solution: Increase nozzle temperature by 5-10°C and verify extrusion flow rate is calibrated. Also check filament diameter matches slicer settings.
Tips for Professional-Looking Makercoins
Design for Printability – Before modeling, consider the printing process. Avoid designs with extremely thin walls (less than 1mm) or fine details that won’t resolve on a 0.4mm nozzle.
Use Contrast Colors – If printing multi-color coins (using filament change or multi-material printer), choose high-contrast colors for maximum visibility of engraved details.
Add a Border – A thin decorative border around the edge adds professional polish and can hide minor print imperfections.
Test Print First – Always print a small test version (scale to 50%) to check details and dimensions before committing to a full-size print.
Post-Process – Sand rough edges with fine-grit sandpaper (400-600 grit) for a smooth finish. You can also apply a clear coat or paint for extra durability and aesthetics.
Version Control – Keep track of design iterations (makercoin_v1, makercoin_v2, etc.) in Fusion 360 using the “Save As” feature. This makes it easy to refine designs over time.
Document Your Design – Take screenshots or export rendered images from Fusion 360 to document your designs. This is helpful for sharing on social media or recreating lost designs.
Advanced Techniques to Explore
Once you’ve mastered the basic Makercoin, try these advanced techniques to elevate your designs:
Multi-Color Printing – Use filament change mid-print or a multi-material printer to create coins with multiple colors. For more on this topic, see our guide on Creality Creality Ender 3 V3 Plus vs Cre…. Change filament at the layer where your engraving ends to create a contrasting background.
Textured Surfaces – Add texture to the coin face using the “Offset” and “Fillet” tools to create raised patterns like dimples, lines, or geometric shapes.
Embedded QR Codes – Import a QR code as an SVG and engrave it onto your coin. This can link to your portfolio, website, or contact information.
Variable Thickness – Create a coin that’s thicker in the center and thinner at the edges for a more ergonomic grip. Use the “Sweep” or “Loft” tools instead of simple Revolve.
Multi-Part Assembly – Design coins that snap together or contain hidden compartments. This requires planning for tolerances and may need iterative prototyping.
Frequently Asked Questions (FAQ)
Q1: How long does it take to design a Makercoin from scratch?
A: For beginners, expect 30-60 minutes to complete the basic coin shape and simple engraving. Adding custom SVG designs or complex raised text can add another 30-60 minutes. With practice, experienced makers can design a full Makercoin in under 30 minutes. The timeline also depends on the complexity of your design—simple text or logos are quick, while intricate multi-layered patterns take longer.
Q2: Can I use a logo from my company or brand on a Makercoin?
A: Yes, provided you have the legal right to use the logo. If you own the company or have explicit permission, you can import the logo into Inkscape, convert it to vectors (or trace it from an image), and use it as an SVG in Fusion 360. Always respect copyright and trademark laws when creating designs for distribution or sale.
Q3: What’s the ideal size for a Makercoin?
A: The standard Makercoin size is 40-50mm in diameter (similar to a poker chip) with a thickness of 2-3mm. This size fits comfortably in hand, prints relatively quickly (typically 30-60 minutes), and provides enough surface area for detailed engravings. Smaller coins (30-35mm) are good for keychains, while larger coins (60mm+) make impressive display pieces but take longer to print.
Q4: Do I need a 3D printer to make a Makercoin, or can I outsource printing?
A: While having your own 3D printer is convenient, it’s not required. You can outsource printing to online services like Shapeways, 3DHubs, or local maker spaces. Simply export your .stl file from Fusion 360 and upload it to a printing service. This is a great option if you want to prototype designs before investing in a printer or if you need high-quality prints with professional materials like metal or resin.
Q5: Why won’t my SVG import into Fusion 360?
A: Common reasons include: (1) The SVG contains unsupported features like gradients or filters—remove these in Inkscape, (2) Paths are too complex or contain too many nodes—use Path > Simplify to reduce complexity, (3) The file is corrupted or not a valid SVG—try exporting as DXF instead, which Fusion 360 handles more reliably, or (4) The SVG file is too large—try importing a simpler version first to verify the process works.
Q6: How many Makercoins can I print from a single roll of filament?
A: A standard 1kg roll of 1.75mm filament (approximately 330 meters) can produce 150-200 standard-size Makercoins (40mm diameter, 2.5mm thick) at 100% infill. Each coin uses approximately 5-7 grams of filament. This makes Makercoins an excellent project for using up leftover filament scraps from larger prints.
Q7: Can I sell Makercoins with my designs?
A: Yes, you can sell physical Makercoins you print, provided you own the intellectual property rights to the designs. However, you cannot redistribute or sell the design files (.stl, .f3d, etc.) unless you explicitly created them and hold all rights. Always check licensing terms for any third-party assets (fonts, logos, vector graphics) you incorporate into your designs. For business use, consider the commercial implications of distributing branded items.
Q8: What’s the difference between a Makercoin and a 3D printed medallion?
A: The terms are often used interchangeably, but Makercoins specifically refer to challenge coins in the maker community tradition—personalized tokens representing maker identity and skills. Medallions is a broader term for any commemorative 3D printed disc. Makercoins typically feature maker-specific imagery (tools, software logos, QR codes), while medallions may commemorate events, achievements, or organizations. Both follow similar design and printing processes.
Video Tutorial: Step-by-Step Walkthrough
For visual learners, here’s a comprehensive video tutorial covering the entire Makercoin creation process:
Video Timestamps for Quick Reference
0:53 – Software overview and introduction
1:24 – Setting up Fusion 360 for 3D printing
3:17 – Sketch workflow explained
3:54 – Creating the first sketch (for revolve)
10:07 – Revolve feature demonstration
11:47 – Extrude sketch basics
13:57 – Extrude feature in action
14:49 – Circular pattern technique
17:35 – Creating SVG vectors using Inkscape
18:53 – Importing .svg into Fusion 360 as a sketch
20:47 – Extrude cut using imported .svg
22:32 – Exporting as .stl for 3D printing
Additional Resources and Learning Materials? Check the best deals on Amazon:
As an Amazon Associate, we earn from qualifying purchases.