
David L Walmsley and Emilie Sellier, UK scientists at Vernalis Research, have 3D printed a new device for flow chemistry applications, outlining their study in the recently published ‘Design and Development of a 3D-printed back-pressure regulator.’
With the fabrication of a new back-pressure regulator, the researchers are hoping to improve flow rates in chemistry systems like continuous-flow synthesis. In this study, the authors strive to combine flow chemistry into medicinal chemistry as they refine the ‘unsung hero of flow chemistry,’ for assisting in the transition from a batch reactor to a flow system.
The regulator is required to keep comprehensive pressure, from the pump head, through the reactor, and ultimately the BPR too.

Understanding 3D Printed Thread Mechanics
Example diagram of the fluidic system highlighting the backpressure regulator.
The BPR was 3D printed in two separate faceplates, allowing the researchers to insert hex nuts at the appropriate points and then complete the print, as well as sealing in the nuts. Tinkercad was used for the 3D design of the faceplates for the BPR, along with Cura software, and an Ultimaker 3 for 3D printing.
Optimal Print Settings for Functional Threads
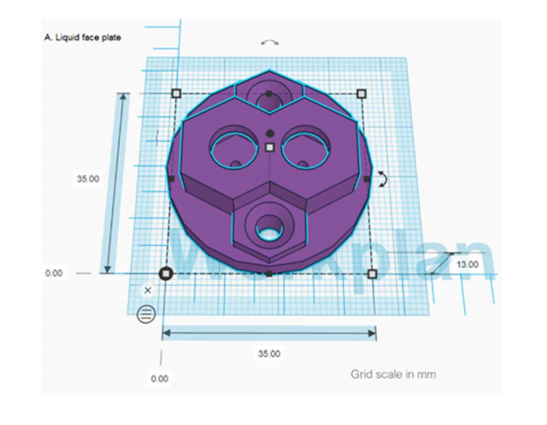
CAD diagram of back-pressure regulator. A; Liquid face plate
The chosen material for the BPR was polypropylene (PP), due to its chemical resistance. During the study, the authors were able to fabricate up to nine of the faceplates at once on the Ultimaker 3, with only one pause in printing. The researchers listed the following details for the print:
- The liquid face plate’s underside was built onto the print table, resulting in a smooth surface.
- Two slots, rectangular in shape, connected to the membrane, to both liquid input and output.
- Two bolt holes were built into the design for securing both plates together.
- A gas face place was created for one M5 nut to provide a connection to the air supply, via a thread and tubing.

Scaling and Tolerance Calibration
Parts and assembly of the back-pressure regulator
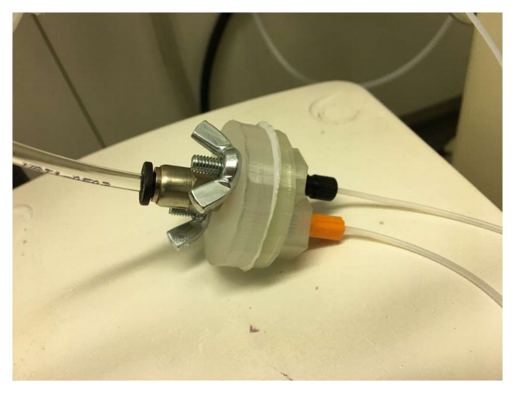
Image of 3D printed back-pressure regulator.
Three samples were built for this study as the researchers studied consistency in each one and how long it took to 3D print.
“Using one face from one of the BPRs as a template, we marked and cut out the shape of the diaphragm out of 0.1 mm thick PTFE sheet. Holes for the M4 bolts to pass through were also marked using the template and then cut out using 4 mm hollow punch. Similarly, we cut out a gasket layer that would be placed on the gas face side of the membrane and cut out the center using a 9 mm hollow punch,” explained the researchers.
Material Selection for Threaded Parts
The plates were stabilized with two ‘lightly secured’ 2 x M4 stainless steel wing nuts which served to add pressure to the design.
“Fittings for liquid input and output were installed into the liquid face plate and the gas face plate push fit was connected to the regulated gas supply suing 4 mm ID tubing. The BPR was tested for leaks and performance using tetrahydrofuran and acetonitrile as the solvents,” concluded the researchers.
Testing and Quality Validation
“STL files that can be used to 3D print the Vernalis BPR can be found here. A list of parts and instructions for assembly are included in the files as well as in the supplementary information of the paper, ‘Design and Development of a 3D-printed back-pressure regulator.’”
What do you think of this news? Let us know your thoughts! Join the discussion of this and other 3D printing topics at 3DPrintBoard.com.
[Source / Images: ‘Design and Development of a 3D-printed back-pressure regulator’]
Understanding 3D Printed Thread Mechanics
The post UK Researchers Develop 3D Printed Regulator for Continuous Flow Synthesis in Chemistry appeared first on 3DPrint.com | The Voice of 3D Printing / Additive Manufacturing.
Frequently Asked Questions
Can you 3D print working threads and screws?
Yes, working threads can be 3D printed with proper settings. Layer height of 0.1mm or finer works best, with slower print speeds improving quality. CAD tools like FreeCAD’s Fasteners workbench help generate accurate thread geometries.
What are the best settings for 3D printing threads?
Use 0.1mm layer height, slow speeds (~10mm/s), and tune thread scaling parameters. Common starting points: screw scaling A0.990/B-0.050, nut scaling A1.030/B0.100. Always test print to calibrate for your printer and filament.
📌 Related Articles
- Best 3D Printer Upgrades That Actually Improve Print Quality: Complete 2026 Guide
- The Complete 3D Printing Filament Guide: Types, Properties & When to Use Each
- The Ultimate Guide to 3D Printer Calibration: Complete Step-by-Step Manual
- ABS 3D Printing Settings Guide: Temperature, Enclosure, and Cooling for Strong Parts
- Best Budget 3D Printer Upgrades That Actually Improve Print Quality: Belts, Springs, Hotends & More