
The most important part of orthodontic treatment is the correct positioning and bonding of the brackets. Direct bonding is less accurate and often takes longer due to saliva and inaccessible tooth positions, while indirect bonding is quicker and less likely to cause bracket positioning errors, but is costlier. A team of researchers from Beijing published a paper, “Comparison of three-dimensional printing guides and double-layer guide plates in accurate bracket placement,” where they designed different types of transfer trays, using 3D printing and traditional impressions, and evaluated their “clinical efficacy.”
“With the increasing applications of indirect bonding, various designs of transfer trays and novel technologies are implemented in the treatment procedure. In the laboratory stage, the patients’ occlusal interrelationship can be duplicated either by impression or digital scanning,” the researchers wrote. “The former is a traditional method to generate double-layer guide plates; though with a lower cost, this method typically takes longer laboratory time and is susceptible to human errors. The latter is incorporated with cutting-edge 3D printing technology that provides various advantages, such as precise 3D images, convenience in file storage, and accuracy in image analysis and outcome prediction [5].”
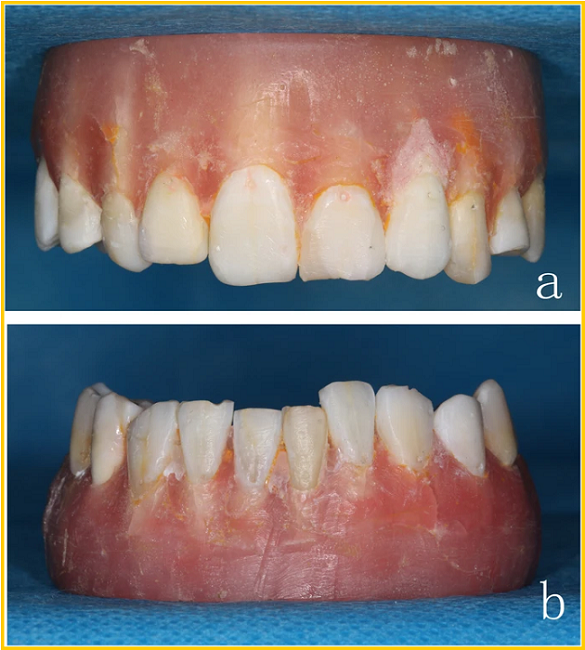
The study model. (a) Maxillary model with marking points. (b) Mandibular model with marking points.
In the laboratory stage of indirect bonding, brackets are bonded to the patient’s orthodontic model, and then a customized transfer tray is used to place them on the actual surface of the tooth in the clinical stage. To make the models for this study, the team collected 140 teeth with normal crown morphology and no evident defects or restorations, sterilized them, and arranged them into “five pairs of full dentition” before labeling the marking points “on the buccal/labial surface of the crown.”
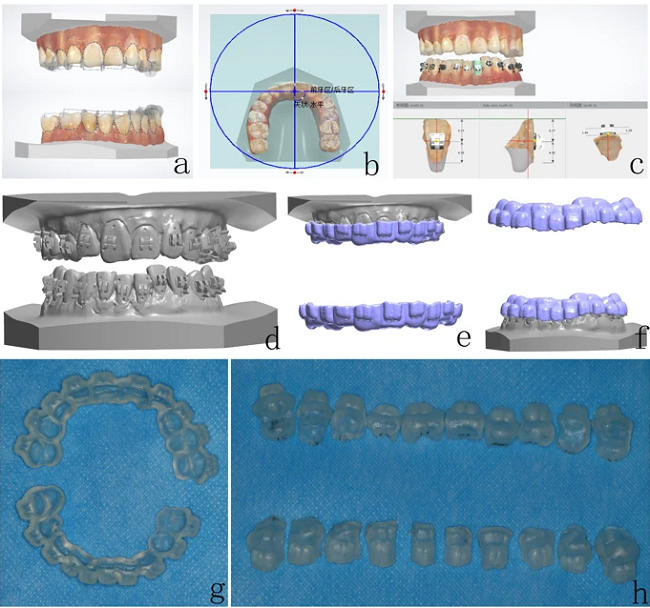
Digital design and 3D printing guides. (a) Distinguishing teeth and gingiva on the digital models. (b) Establishing the occlusal plane. (c) Adjusting the bracket positioning. (d) Simulation of bracket positioning. (e-f) Guide plate for indirect bonding on digital models. (g) 3D printing guide – whole denture type, and (h) single tooth type.
Next, they created 3D printable indirect bonding guide plates, beginning by generating digital models with the 3Shape TRIOS Standard intraoral scanner. The occlusal plane, axis, and center of individual crowns were established, and the marginal gingiva labeled, using 3Shape software, and guide plates for the whole denture type and single tooth type for 3D printed on a ProJet 3510 DP.
“The brackets were positioned in the 3D printing guides (the whole denture type or the single tooth type), and 3 M Unitek Transbond
XT light-curable adhesives were applied to the base of the brackets,” the team explained about the indirect bonding procedure. “The 3D printing guides were then placed on the study models, and each border of the brackets was light-cured for 5 s.”
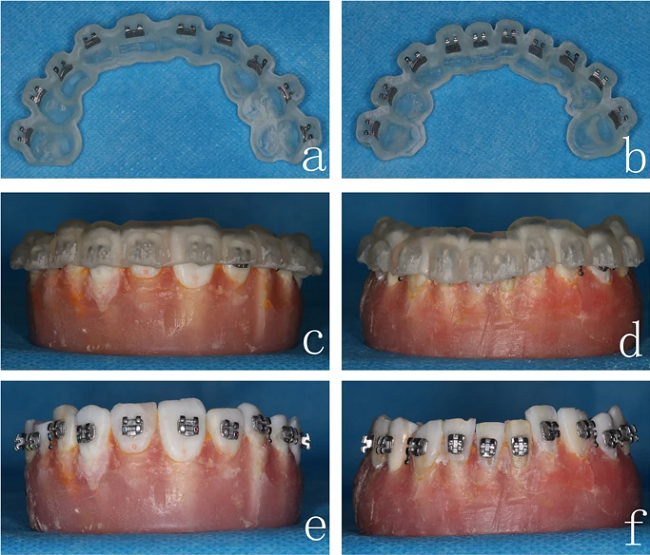
3D printing guides and indirect bonding procedure. 3D printing guide of the (a) maxillary and (b) mandibular dentitions. 3D printing guides placed on the (c) maxillary and (d) mandibular study models. Completion of bracket positioning on the (e) maxillary and (f) mandibular study models.
In making the traditional trays, the researchers used silicone-based materials to get impressions of the working models with intact marking points, and created plaster casts from the silicone molds.
“A thin layer of separation agents was applied to the cast tooth surfaces; then, the brackets were positioned and adhered on the crowns using 3 M Transbond
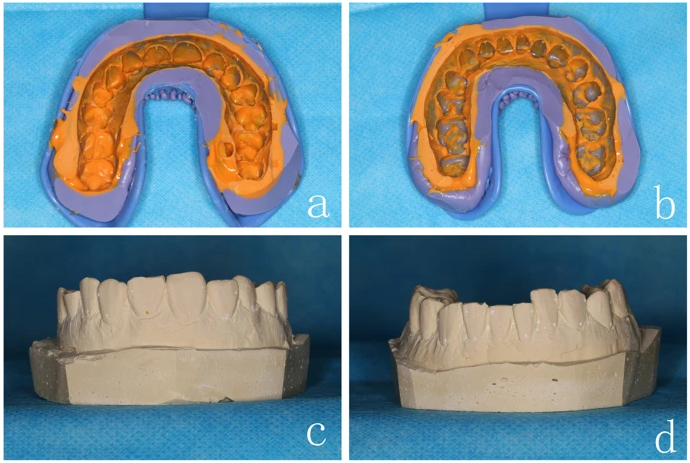
The impression of (a) maxillary and (b) mandibular dentitions, and the plaster casts of (c) maxillary and (d) mandibular dentitions.
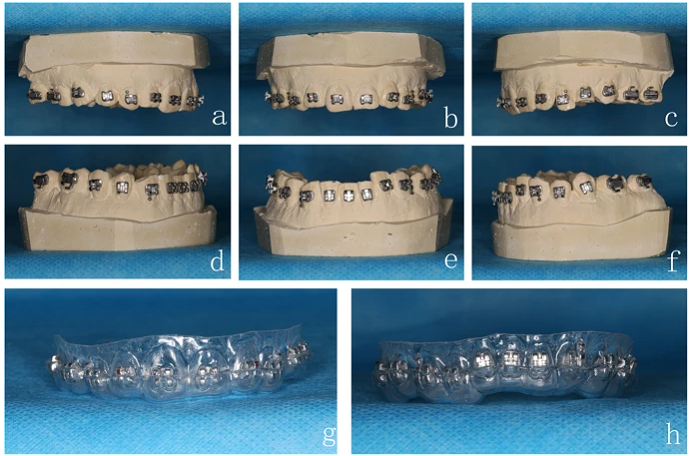
Bracket positioning on the (a-c) maxillary and (d-f) mandibular dentitions. Double-layer guide plate of the (g) maxillary and (h) mandibular dentitions.
For this indirect bonding procedure, the bracket were placed in the double-layer guide plates, with one solution applied to the surfaces of the teeth and another to the bracket base. Then, the guide plates were put on the study models, and after two minutes of fixation, the researchers removed the outer hard layer first, and then the inner soft layer.
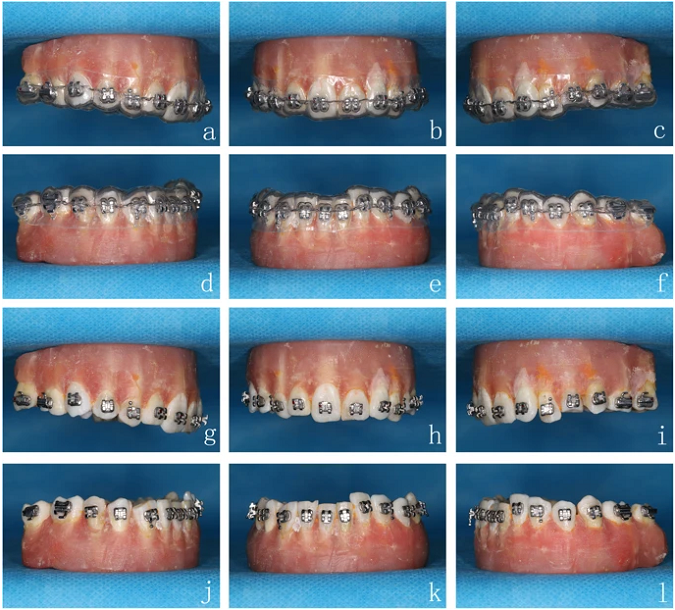
Double-layer guide plates placed on the (a-c) maxillary and (d-f) mandibular study models. Completion of bracket positioning on the (g-i) maxillary and (j-l) mandibular study models.
Next, Materialise Mimics software was used to measure the distance between the marking points and bracket positions in the digital models of both the whole denture and single tooth designs for the 3D printed guide group, while electronic calipers measured the distance in the study models.
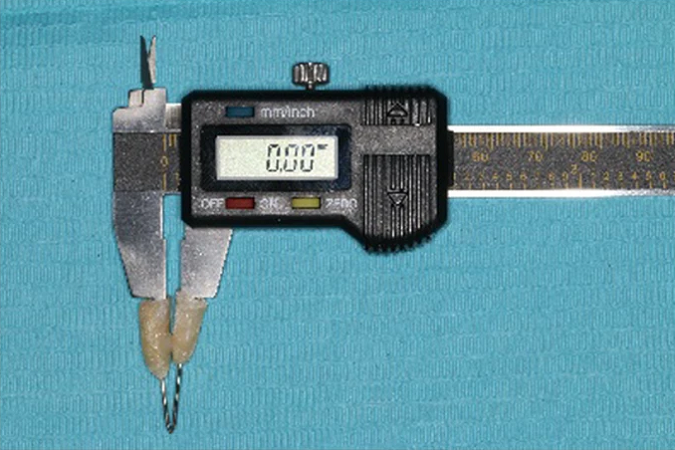
Electronic caliper.
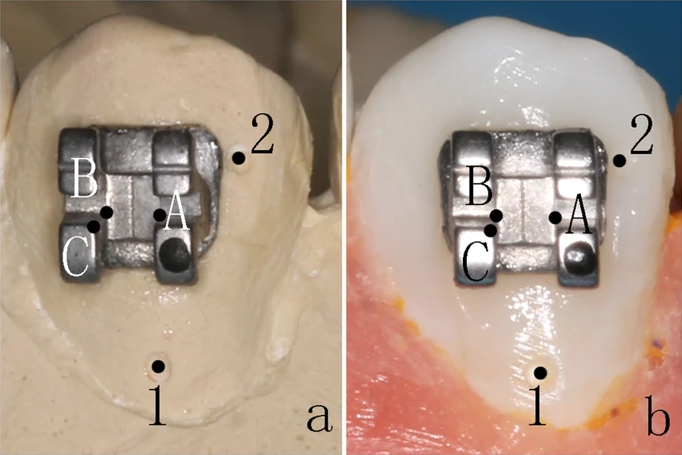
Marking points on the plaster cast and study model.
SPSS software was used to analyze the distance.
“The accuracy of indirect bonding between 3D printing guide and double-layer guide plate was compared using the paired t-test. P < 0.05 indicated statistical significance,” they explained.
The data, reflected in the tables below, showed that there was no statistical difference in the accuracy of bracket positioning between the two types (p = 0.078), and that the 0.6 mm type in the double-layer guide group had much better results (p = 0.036) than the 0.8 mm one.
“We then further compared the accuracy of indirect bonding between 3D printing guides (whole denture type) and double-layer guide plates (0.6 mm), the results were comparable between two groups (P = 0.069),” they wrote. “However, indirect bonding using double-layer guide plates (0.6 mm) cost less chair-side time than the 3D printing guides group.”

Table 1: Comparison of different designs in 3D printing guide group.

Table 2: Comparison of different designs in double-layer guide plate group.

Table 3: Comparison of bracket positioning accuracy between 3D printing guide and double-layer guide plate.
However, while the data showed no statistical significance, the researchers noted that “the overall discrepancy before and after bracket transfer was lower in the 3D printing guides group.”
“This finding might be due to our in vitro study models with only mild malocclusion,” they explained. “Further in vivo studies in more severe clinical cases, such as malocclusion with torsion/tilting/overlapping, will be essential to investigate the efficacy and generalizability of 3D printing guides and double-layer guide plates.”
Discuss this and other 3D printing topics at 3DPrintBoard.com or share your thoughts below.
The post Comparing 3D-Printed and Traditional Guide Plates for Placing Orthodontic Brackets appeared first on 3DPrint.com | The Voice of 3D Printing / Additive Manufacturing.
from Your daily news from 3DPrint.com https://bit.ly/2Y7kgnt